Production settings
The production module settings allow you to identify the different types of object you want to track and tag in the field. This is also where you'll find the information you need to create the configurable fields you'll associate with the type of object, which is additional information linked to an object. Lastly, you can configure alerts for your objects to automate the sending of notifications.
Types of objects
Creates a new type
To create a new type, click on at the bottom right of the page.
Define the name of this new type and associate configurable fields with it. When you create an object, you fill in the configurable fields associated with the object type.
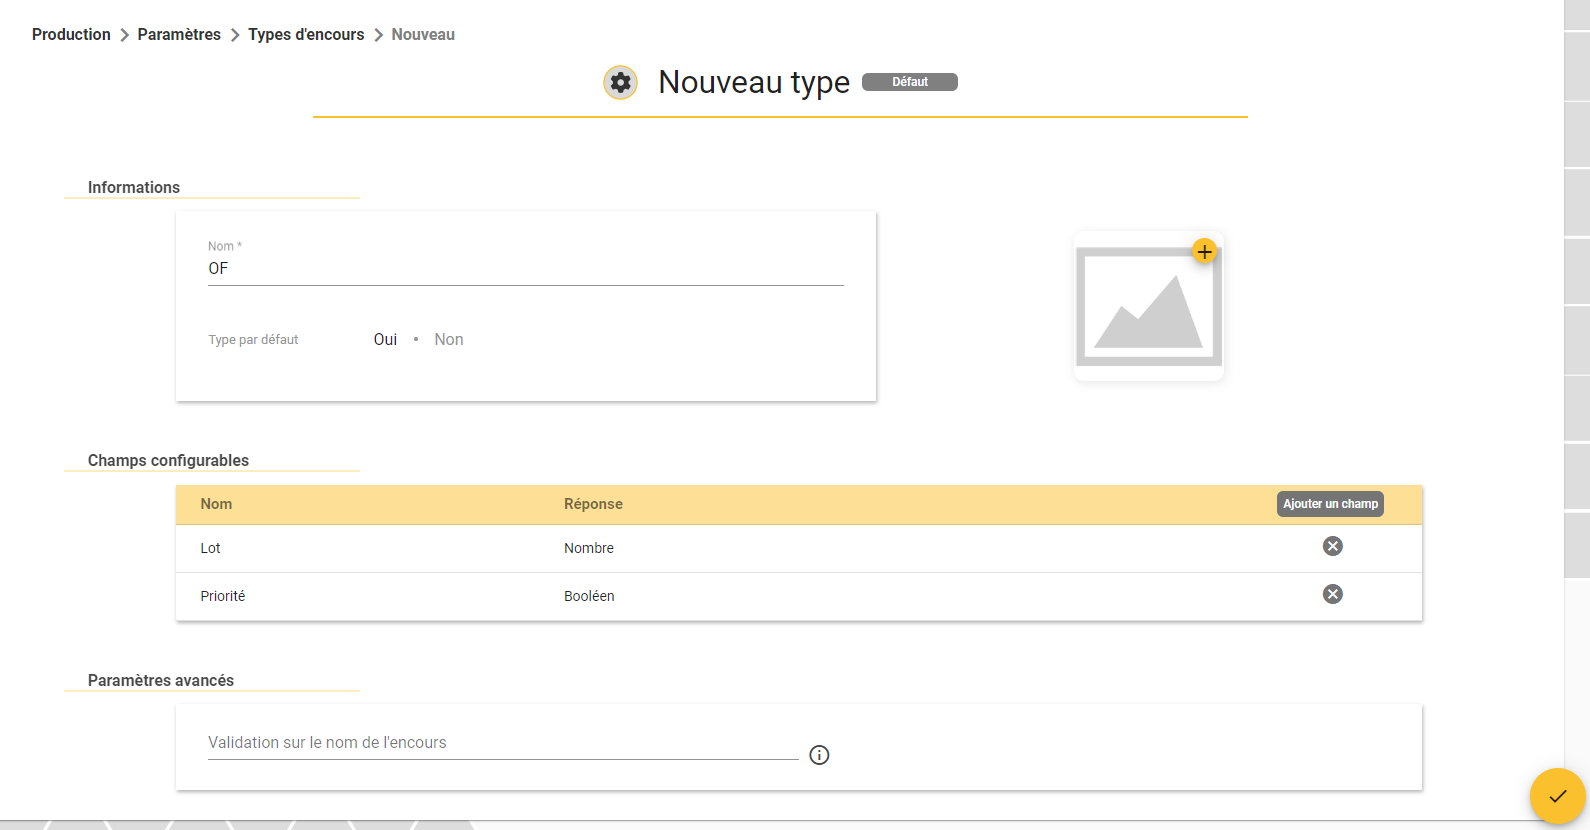
You can also define this new type of outstanding debt as the default type of outstanding debt and add an illustration to it.
Finally, you can define a regular expression to be used for the name of loans of this type. (e.g. OF XXX) Help with writing the REGEX regular expression is available directly from SIGSCAN (or on request from the IA).
Modify the type
To modify an WO type, select the type, click on at the bottom right of your screen.
All fields can be modified, and you can also delete the type using the red recycle bin.
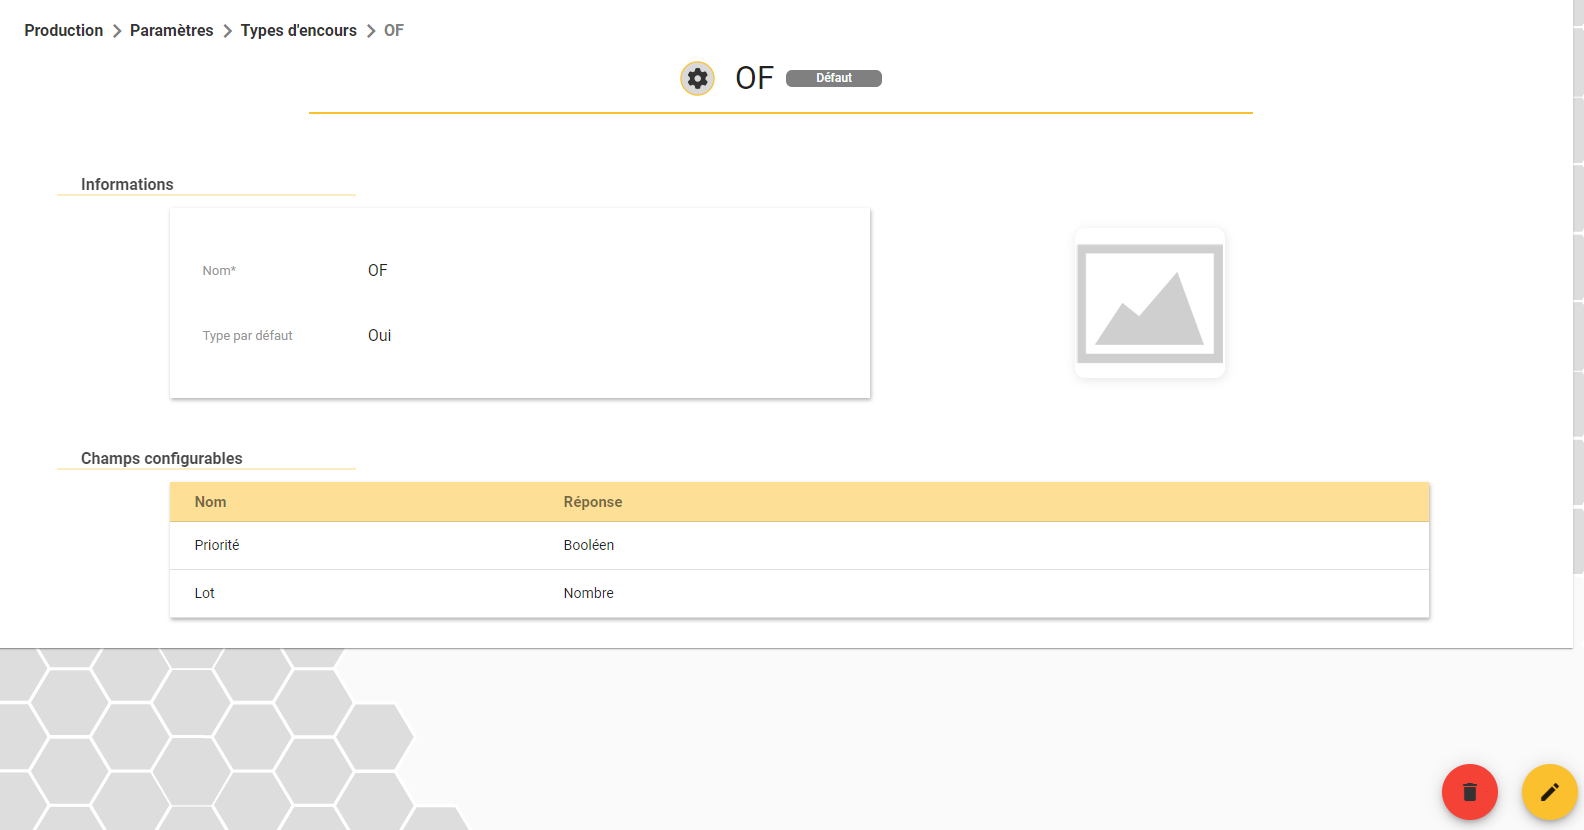
If you are importing your stocks, remember to also change the name of the object type in your import file, otherwise you may create duplicates.
Custom fields
Custom fields are the additional information for an object that you associate with your object types. Custom fields are filled in when an object is created.
Create new custom field
Click on the at the bottom right of the page.
Enter a name to describe the information required, then choose the type of response required (Boolean, Number, Text, Date, List, Duration).
You can also define whether or not this field is mandatory.
You can set fields to read-only to prevent modification after they have been created.
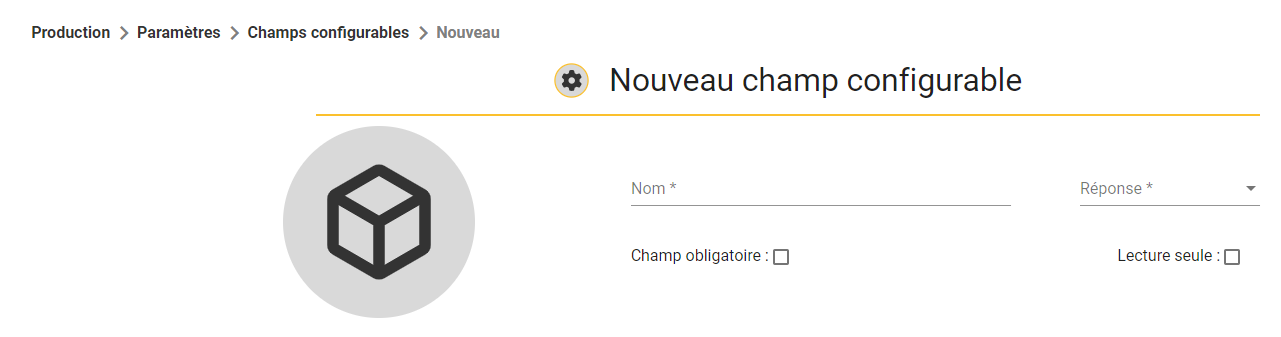
When you select the type of response, you may be asked for additional information (character limit, maximum length, regular expression, etc.) e.g. if you select List as the response, you need to define the items in the list.
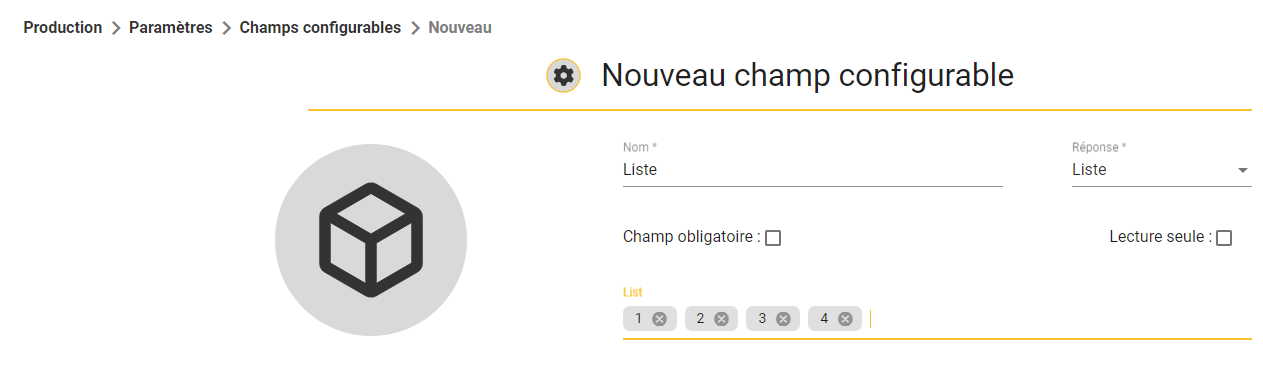
Then confirm at bottom right  .
.
Modify Custom Fields
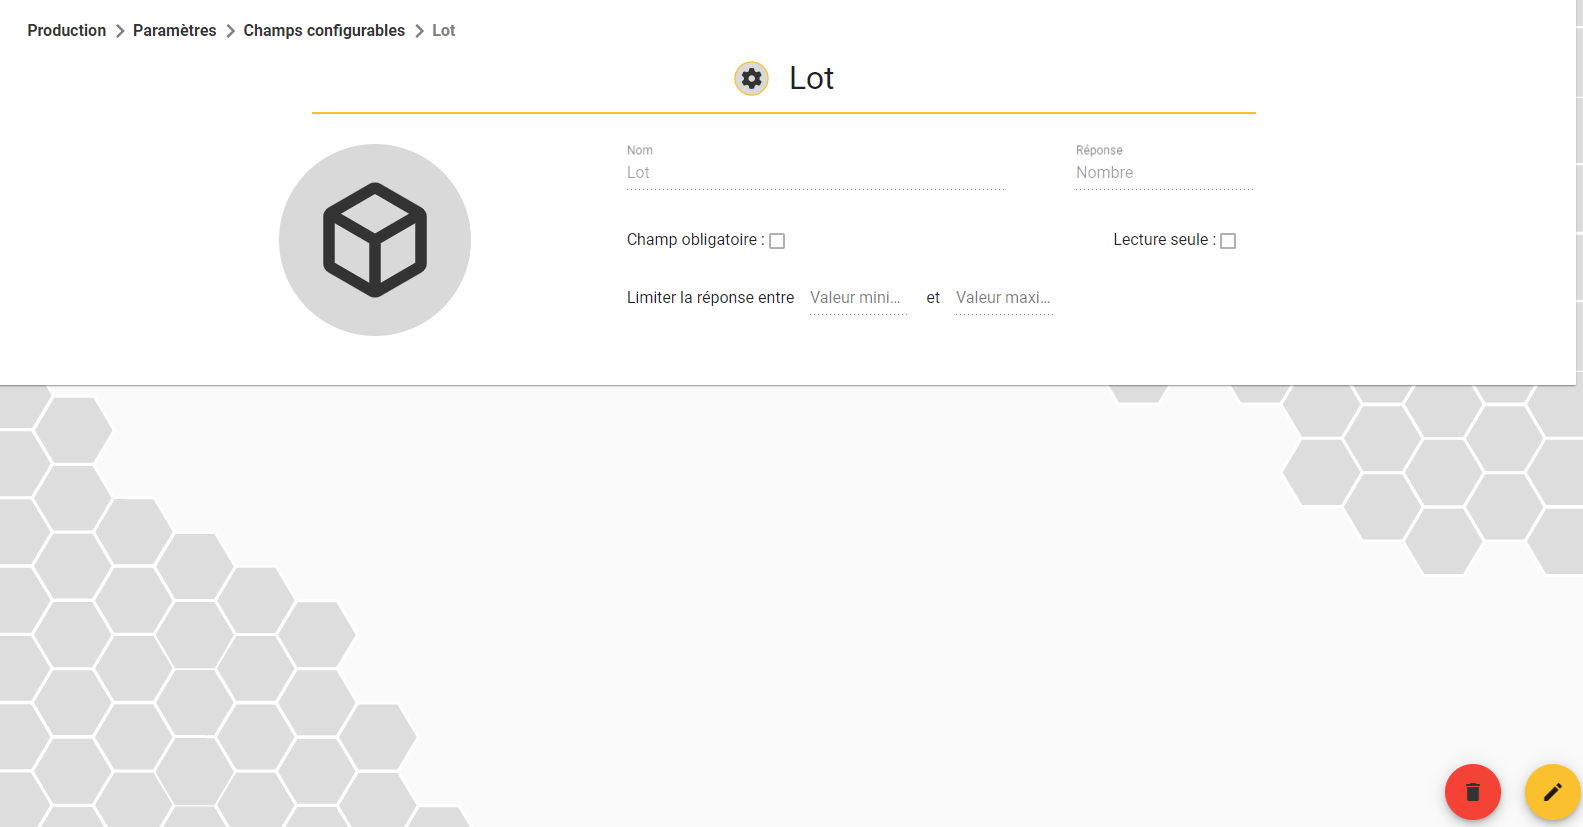
In the list of your custom fields, go to the details of the field you want to modify.
All fields can be modified, and you can also delete a configurable field using the red bin.
Alertes
Set up a new alert
To configure an alert on your tools, go to the list of alerts in the Production module parameters.
On this page you will find the list of alerts you have configured. To create a new alert, click on at bottom right of the page.
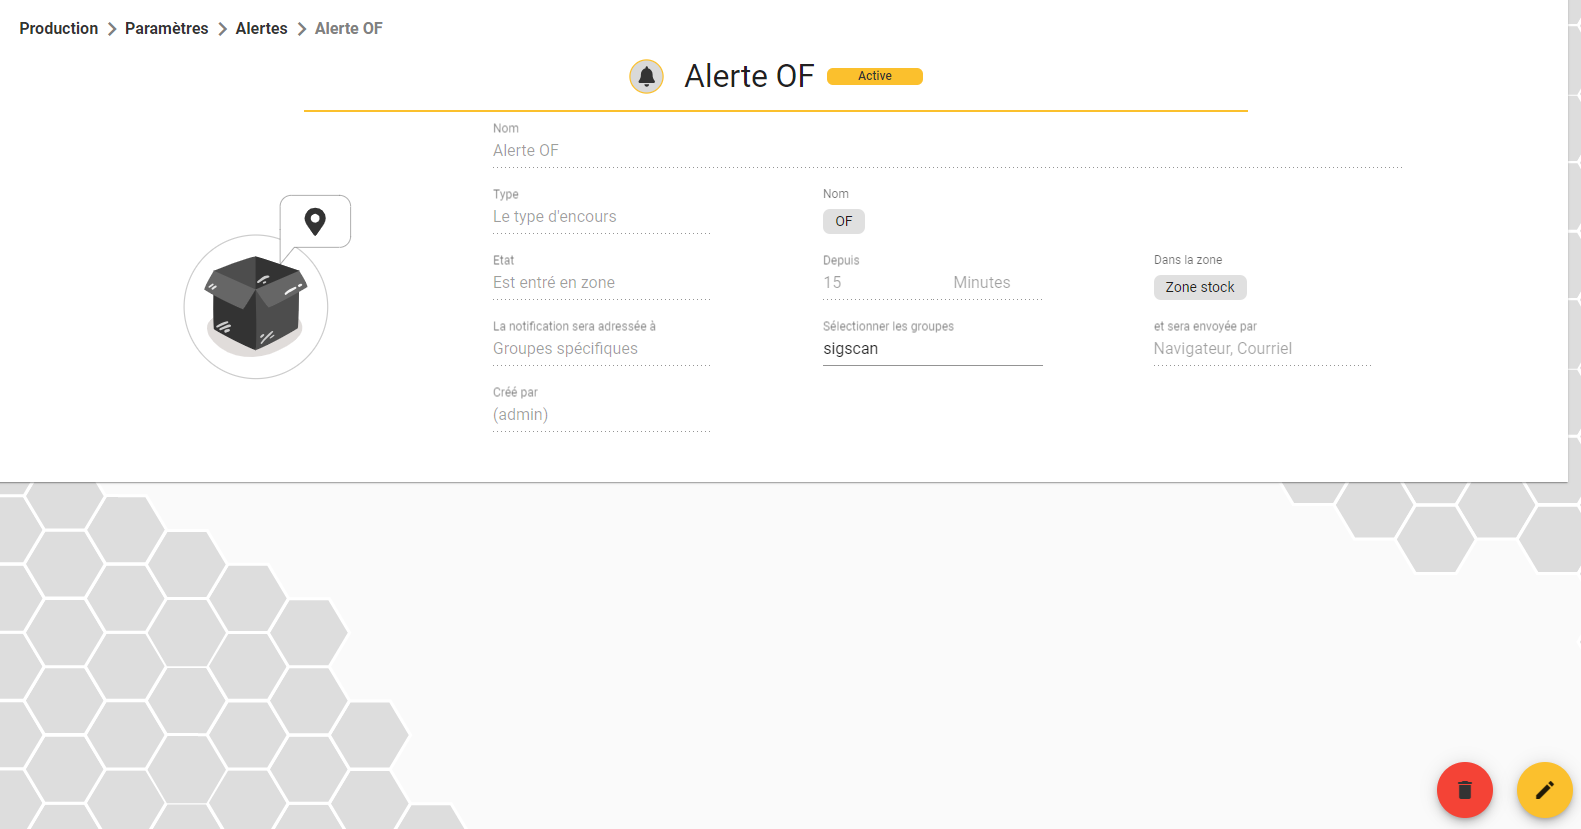
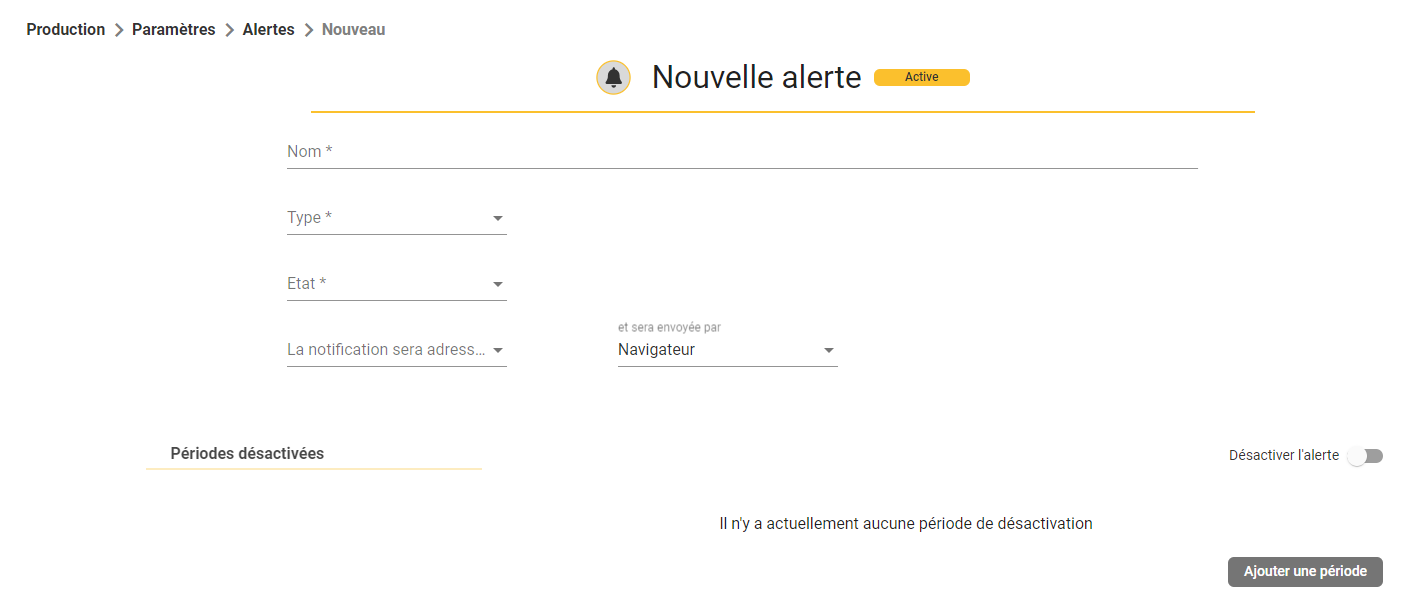
This is the alert configuration page. You must fill in 4 sections: the name, the object(s) affected, the status that triggers the alert and the recipient of the alert.
You can also add temporary deactivation periods for the alert.
Description of the different types and statuses :
Type :
A tool: Your alert will relate to all your tools
The tool: Your alert will relate to the tool or tools identified
Tool type: Your alert will relate to all tools of this type
Custom tool field: Your alert will apply to all tools containing the value indicated in the selected configurable field
Status:
Entered the zone: The object has entered the zone (to be defined)
Has left the zone: The object has left the zone (to be defined
Will see its conformity expire on : The object reached its compliance date on X (defined in a configurable field of the object indicated) :
Is equal to = today (Date of configurable field)
Is less than = In X days (to be defined), depending on the value of the configurable field
Is greater than = Since X days (to be defined), depending on the value of the configurable field
At low voltage: The tag associated with the object is discharged (we advise you to configure a battery alert on all your tags). (see Managing hardware alerts)
Finally, choose who your alert will be sent to and how (default notification, option to send an email).
You can also define programmed deactivation periods for your alert or deactivate it manually.

Modify alert settings
To change the settings for an alert, select the alert you want and click on at the bottom right of the screen.
All fields can be modified, once you have validated the changes in the bottom right-hand corner.