Tools
The Tools module lets you track the Tools you tag within your facility. When configuring the zones that have been defined, your objects can be tracked within these zones using active BLE tags.. (More about tags)
Active tags emit a signal every 5 seconds, which is picked up by Bluetooth receivers before being sent to SIGSCAN.
SIGSCAN is based on the association of virtual objects in the software and your real objects thanks to the tag identifiers (MAC address) on your equipment.
You can then find the list of your objects with their positions and locations on your plans in the web interface. Thanks to the mobile application, you can find objects and declare new positions for your objects as you move around in the field.
WEB interface
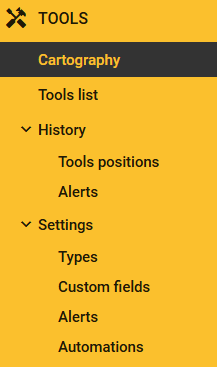
The SIGSCAN Industry equipment module WEB interface can be accessed from the left-hand menu, which has 3 pages covering the various functions, plus a sub-menu dedicated to alerts.
Navigate
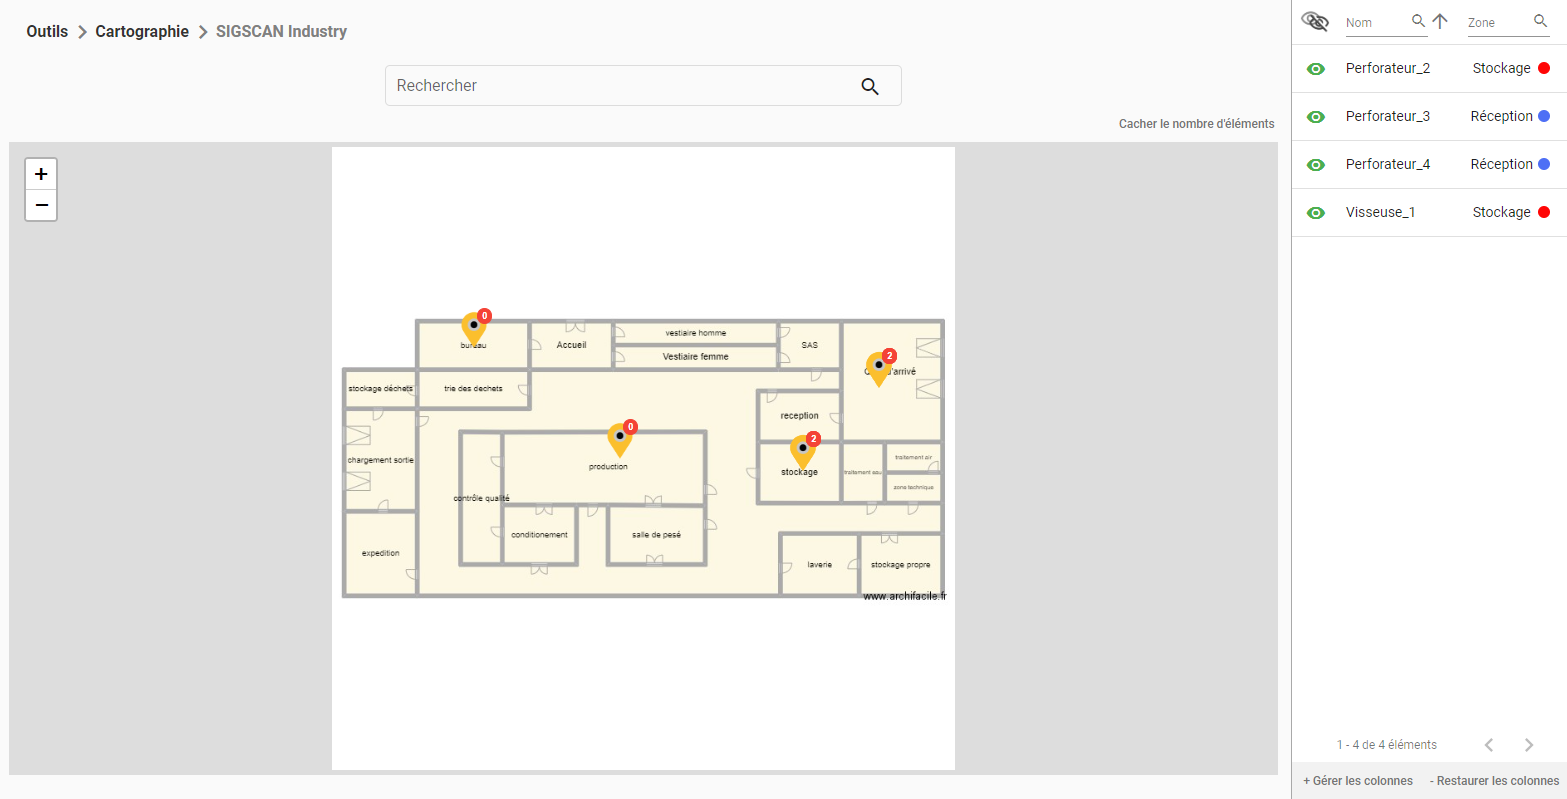
Cartography is designed to show you the positions of your objects according to their zones on your plans.
To search for a tool, you can use the right-hand column.
To use the map, click on the points that appear. Depending on the architecture of your plans in SIGSCAN, you will have more or less depth.
You can display the number of tools present per plan by clicking on the text at the top right of the plan.
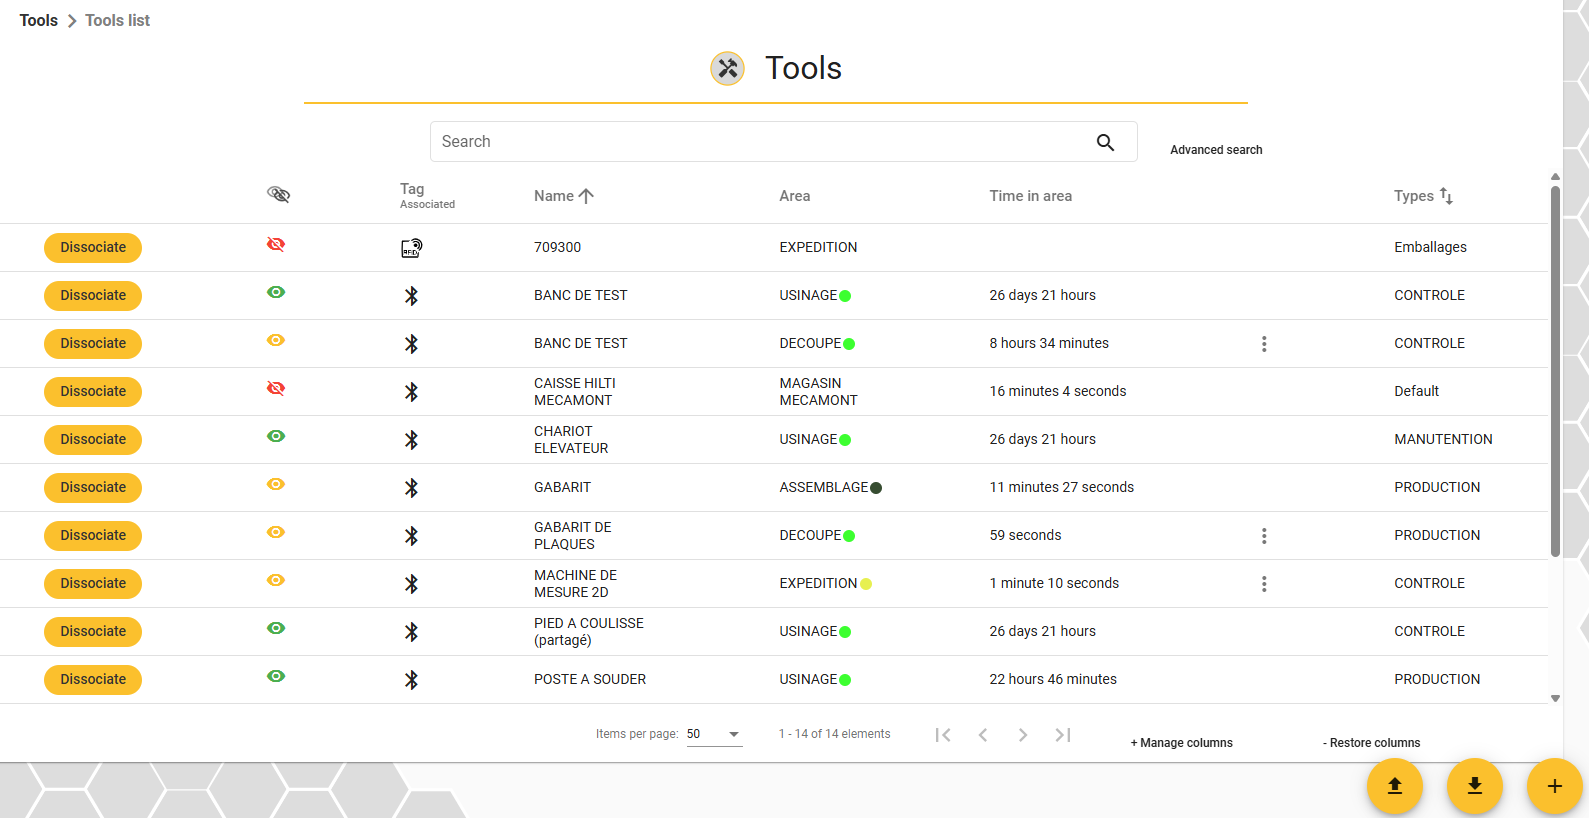
List of tools, allowing you to view all the tools created in your organisation. You can sort/filter them and associate or dissociate them.
The central search bar lets you search by ::
Object name
Tag name
Zone
Type
Zone category
Customs fields
To activate the filters, click on the column headings (Eye, Associated, Name, Tag, Zone, Duration in zone, Type).
You can also make the configurable fields of your tools visible directly in the list, by clicking on Column management at the bottom right of the table and adding or deleting the desired fields.
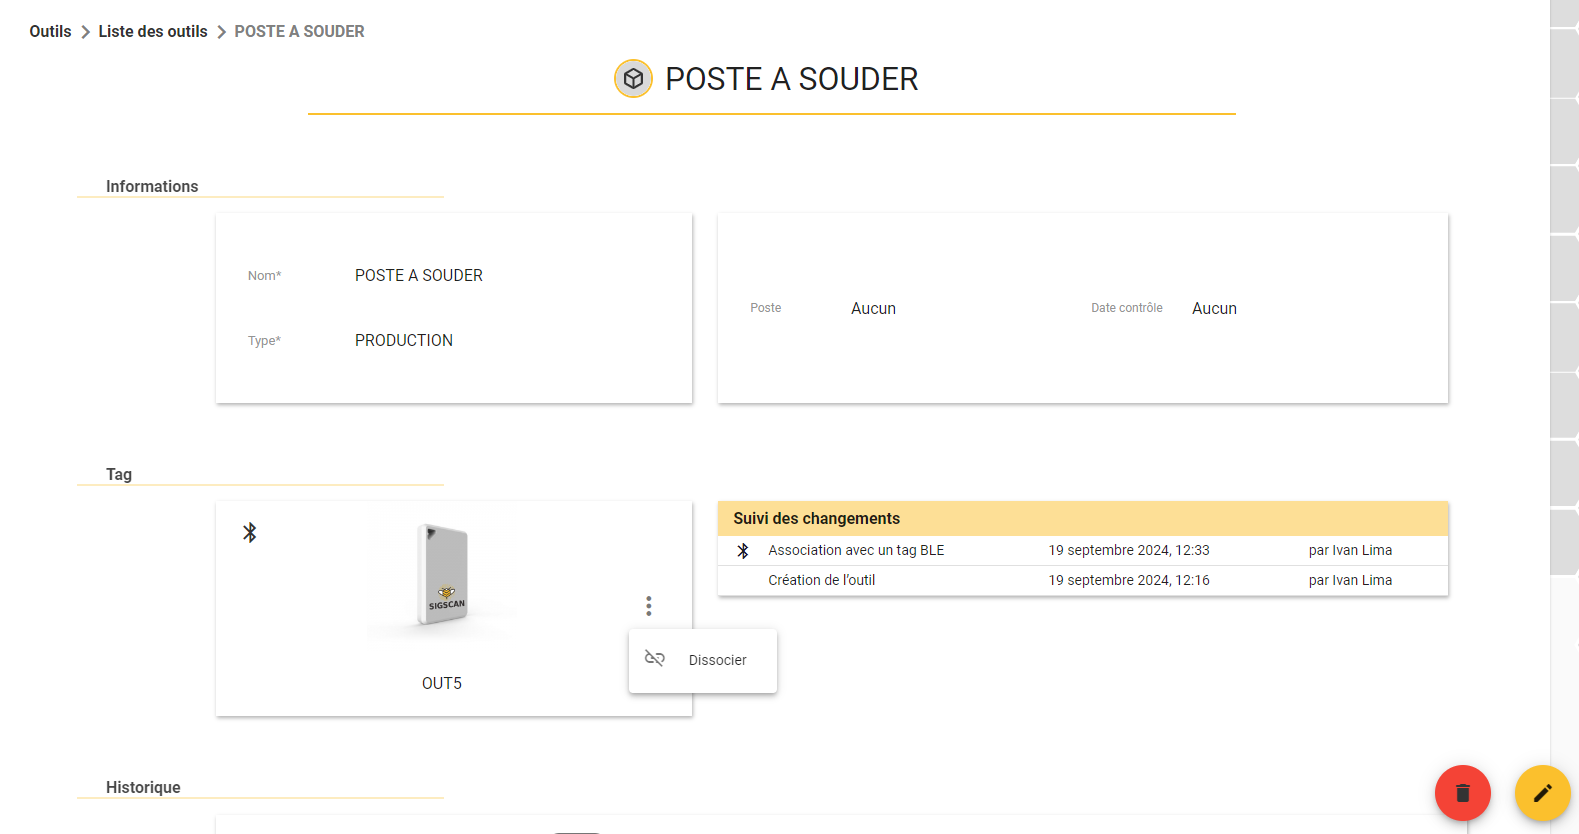
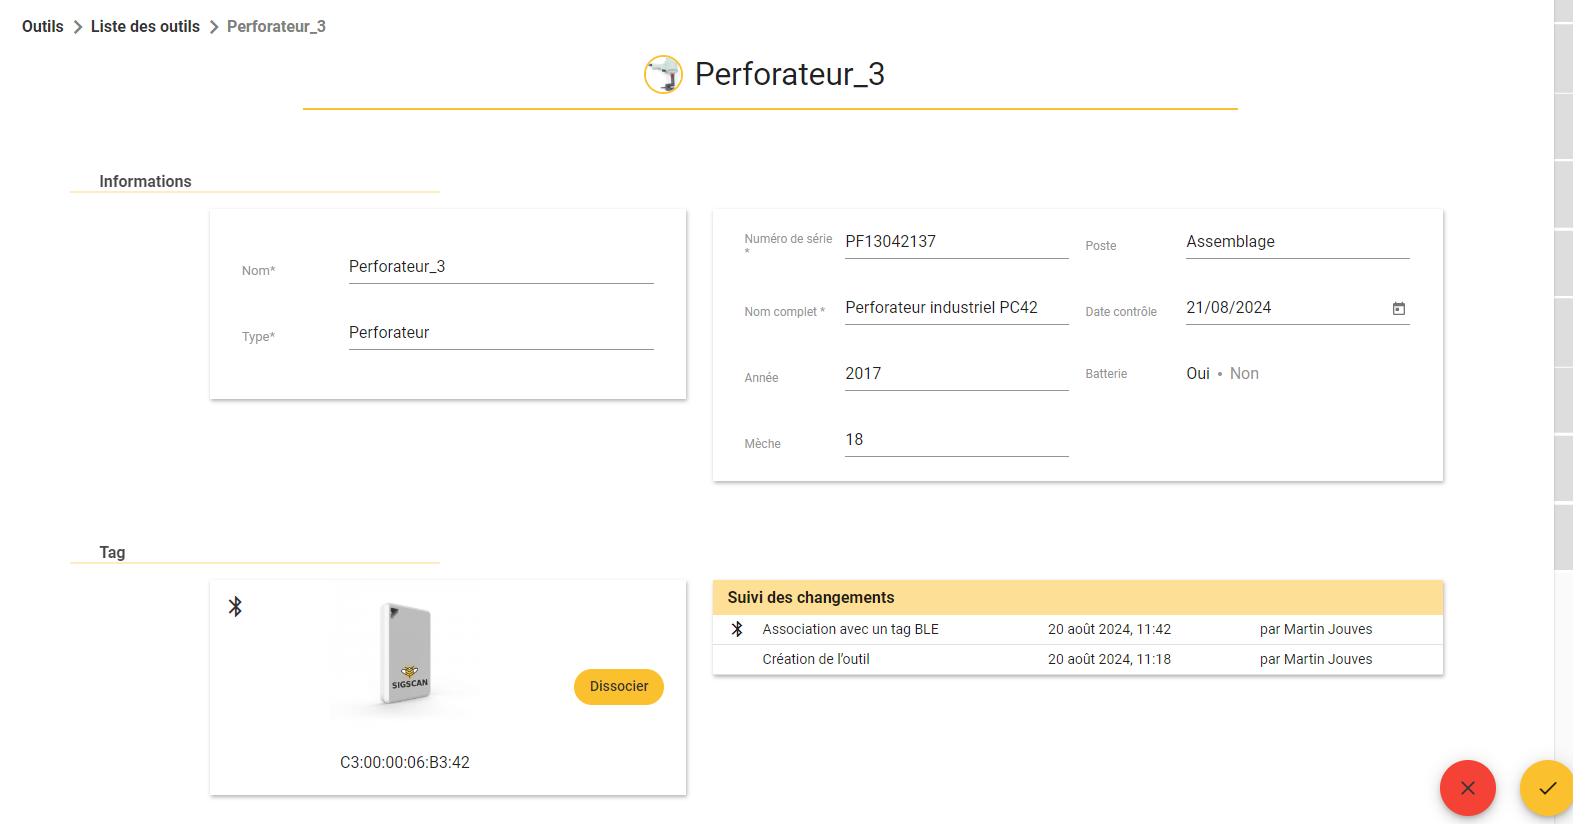
Enter the object details: click on the tool in the list of objects. The object details contain information about your object and its associated tag.
You can view the object's basic information: Name, Type, Configurable fields and associated tag.
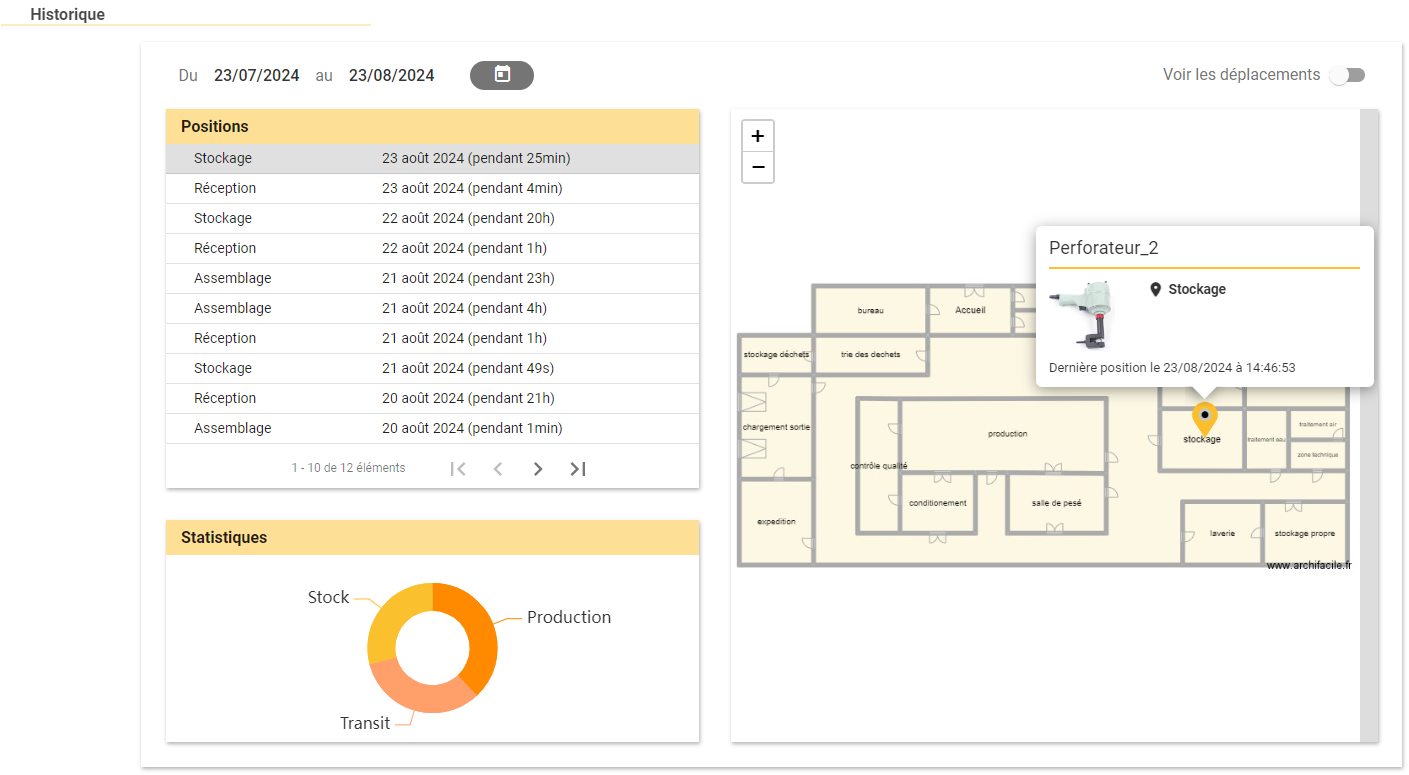
You'll also find additional information: position history, category of zone visited and a graphical representation of your object's movements (you can activate a spaghetti diagram by ticking ‘see movements’).
The history tab lets you view all the positions that have been recorded in SIGSCAN. In the object positions section, you will only see positions associated with objects. You can search or filter using the advanced search. Click on the column icons to sort. You can also add columns by clicking on the icon at the bottom right of the list and adding your own configurable fields to the list.
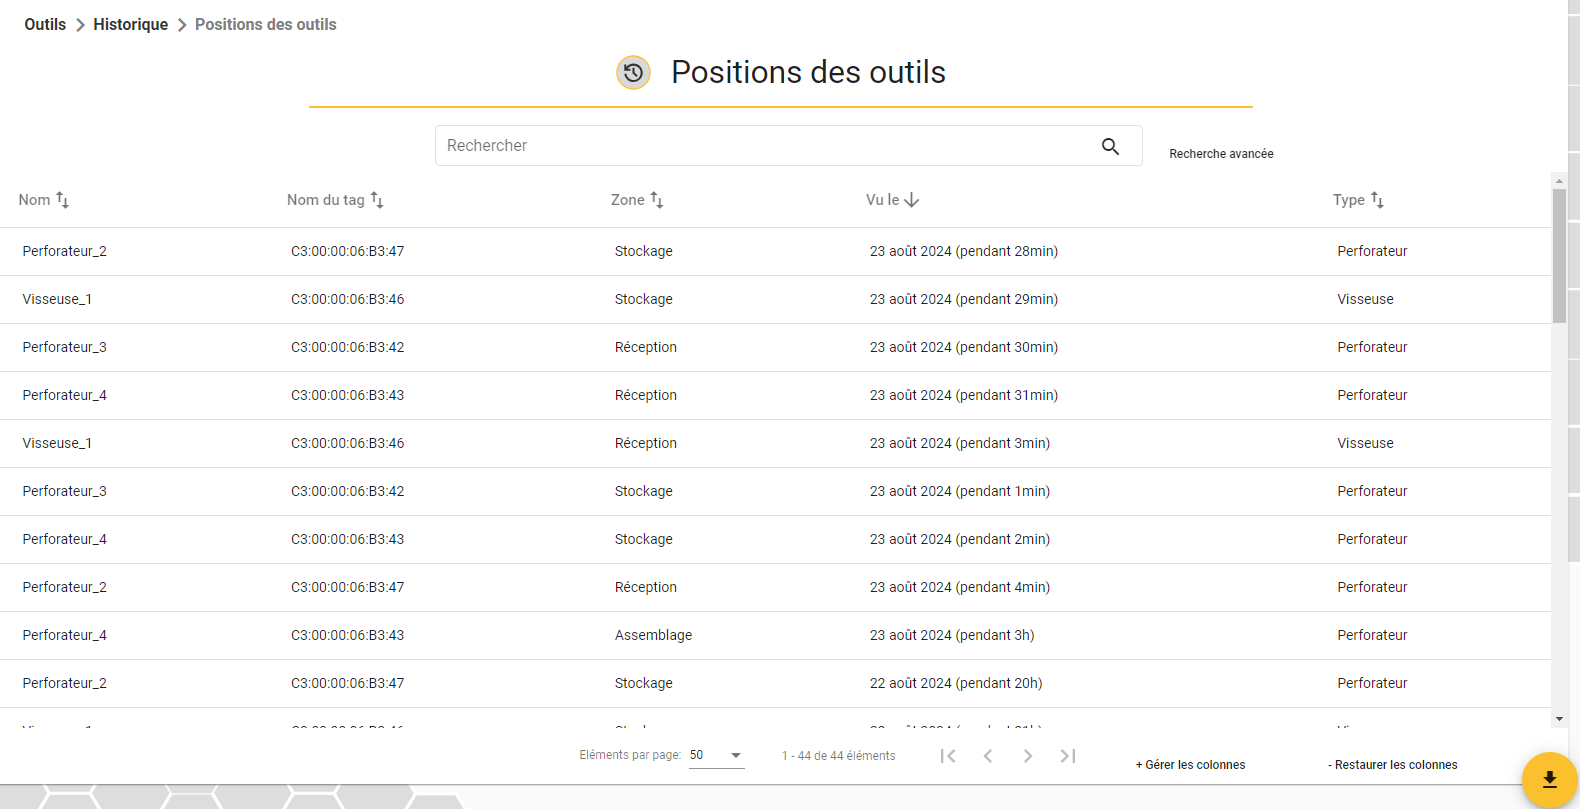
You can extract the object position history by clicking on the import button at the bottom right of your screen. The filter applied will be taken into account when you export.
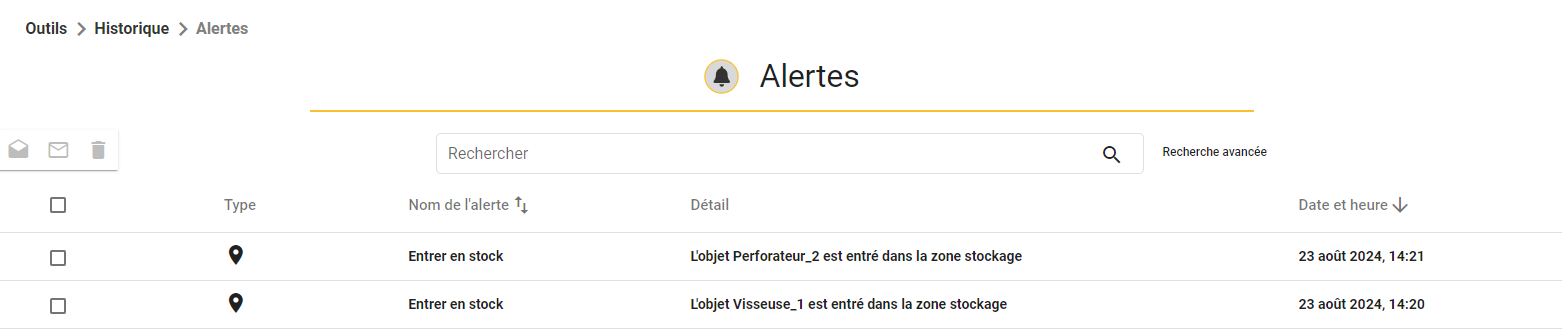
You can also consult the list of alert notifications that you have configured for your tools.
Add and manage tools
To identify and track your tools with SIGSCAN, you need to create these tools in SIGSCAN. This will enable you to associate a tag with a tool and then track the tool by following the tag.
Go to the list of tools
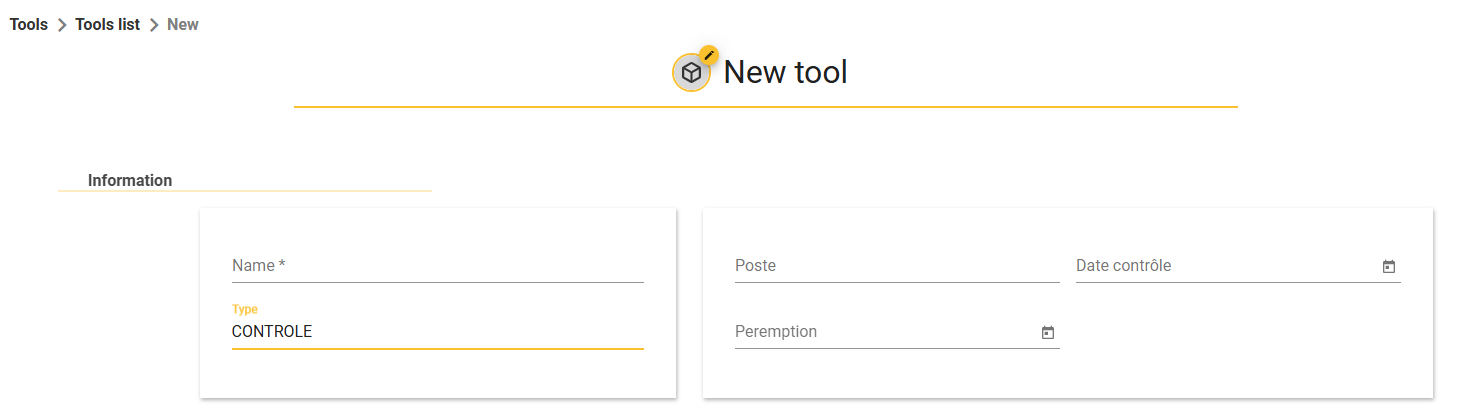
Add a tool
To create a new tool, click on the  at the bottom right of the page.
Give your tool a name and assign a type (the types are defined when the module is configured). Depending on the type you assign to your object, you will have additional fields to fill in.
Once you have filled in all the information, remember to validate  bottom right.
Manage a tool
Managing a tool involves modifying the various fields in the tool, its name or its type.
Go to the details of a tool and click on  at the bottom right of your screen, change the information you want and confirm your changes by clicking on at the bottom right of your screen.
Associating and dissociating tools with active tags (BLE)
The main actions to be carried out when using SIGSCAN are to combine and separate the tools.
BLE Association from the web
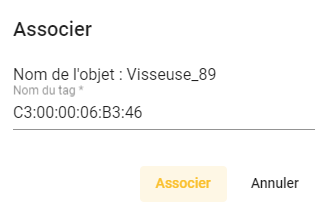
From the list of objects, click on  .
.
Enter the name of the tag you wish to associate (by default, tag names are the MAC address present on the tag).
Tool alerts
SIGSCAN software lets you set up alerts to monitor your tools and keep you informed of any situation.
Setting up a new alert
To set up an alert for your tools, go to the list of your alerts in the alerts page of the tools module settings.
On this page you will find a list of the alerts you have configured. To create a new alert, click on at the bottom right of the page.
Here's the alert configuration page, which you need to fill in in 4 sections: the name, the object(s) affected, the status that triggers the alert, and the destination of the alert.
You can also temporarily deactivate the alert.
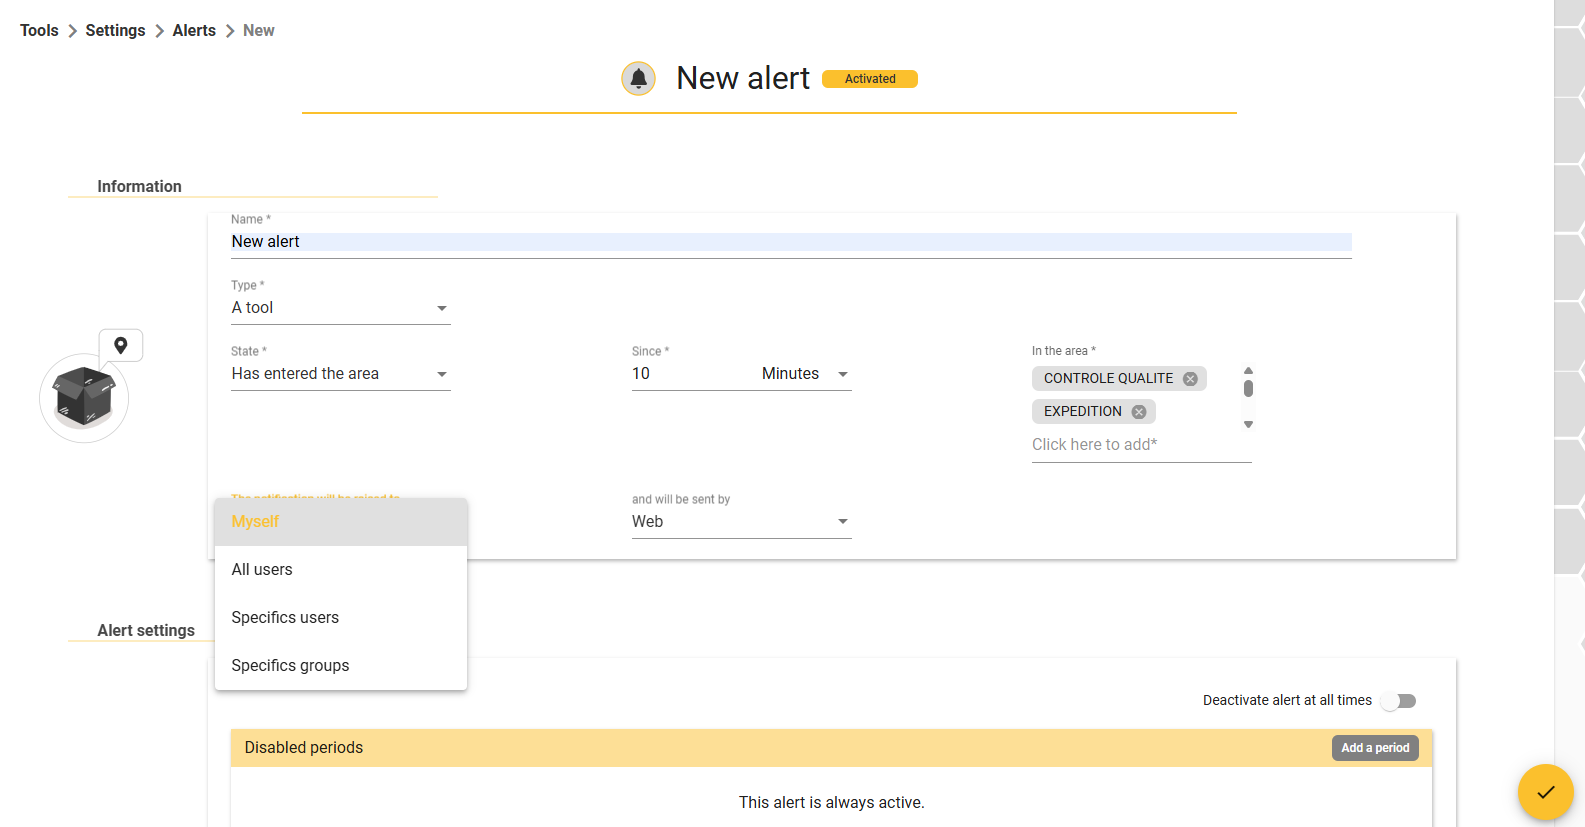
Description of the different types and statuses :
Type :
A tool: Your alert will relate to all your tools
The tool: Your alert will relate to the tool or tools identified
Tool type: Your alert will relate to all tools of this type
Custom tool field: Your alert will apply to all tools containing the value indicated in the selected configurable field
Status:
Entered the zone: The object has entered the identified zone
Exited the zone: The object has exited the identified zone
Conformity will expire on : The object has reached its compliance date, the X defined in a configurable field in the object:
Is equal to = today (Date of configurable field)
Is less than = In X days (to be defined), depending on the value of the configurable field
Is greater than = Since X days (to be defined), depending on the value of the configurable field
At low voltage: The tag associated with the object is discharged (we advise you to configure a battery alert for all your tags (see Hardware alert management).
Choose who your alert will be sent to and how (notification by default, possibility of sending an email).
You can also define programmed deactivation periods for your alert or deactivate it manually.

Modifying alert parameters
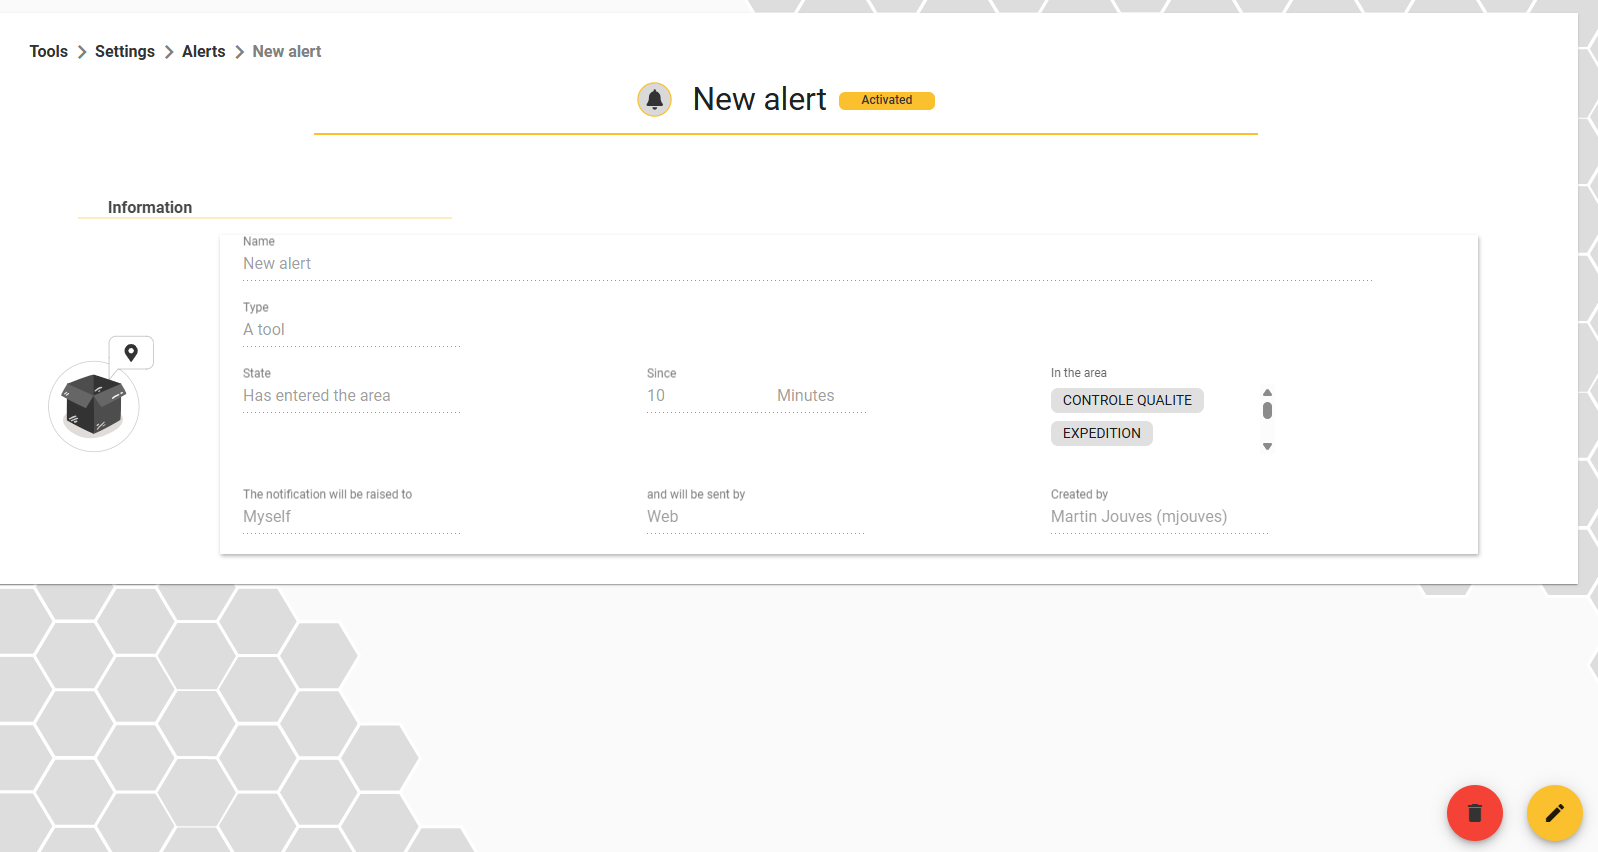
To change the settings for an alert, select the alert you want and click on at the bottom right of the screen.
All the fields can be modified, once you have validated the changes in the bottom right-hand corner.
View alerts
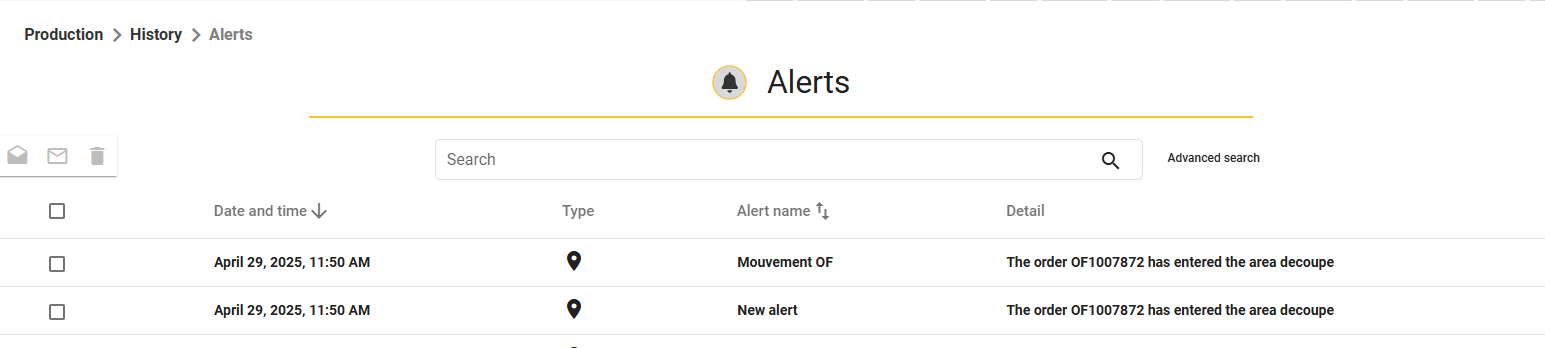
You can access the list of notifications due to your alerts on your tools from the history sub-menu of the tools module, where you will find all your alerts on your tools in list form, you can search and filter among the alerts, you can make the notifications of the alerts read disappear and change their status with the following icons .
Mobile application
The SIGSCAN Industry mobile application is available on the mobile terminals supplied with the solution. These terminals are equipped with an RFID reader and a code reader.
These terminals are equipped with an RFID reader and a code reader, and are ideal for searching for equipment and associating/disassociating tags.
Navigating the mobile application
Before doing anything in the application, check that you are in the right module. Return to the module selection page using the back arrow on the bottom left of your mobile device and make sure you are in the Tools module.
The navigation menu gives you direct access to the following 4 functions:
Associate a tag with a tool
Search for and modify tools (list of tools)
Declare the position of a tool
Unlink a tag from a tool
Associate a tag
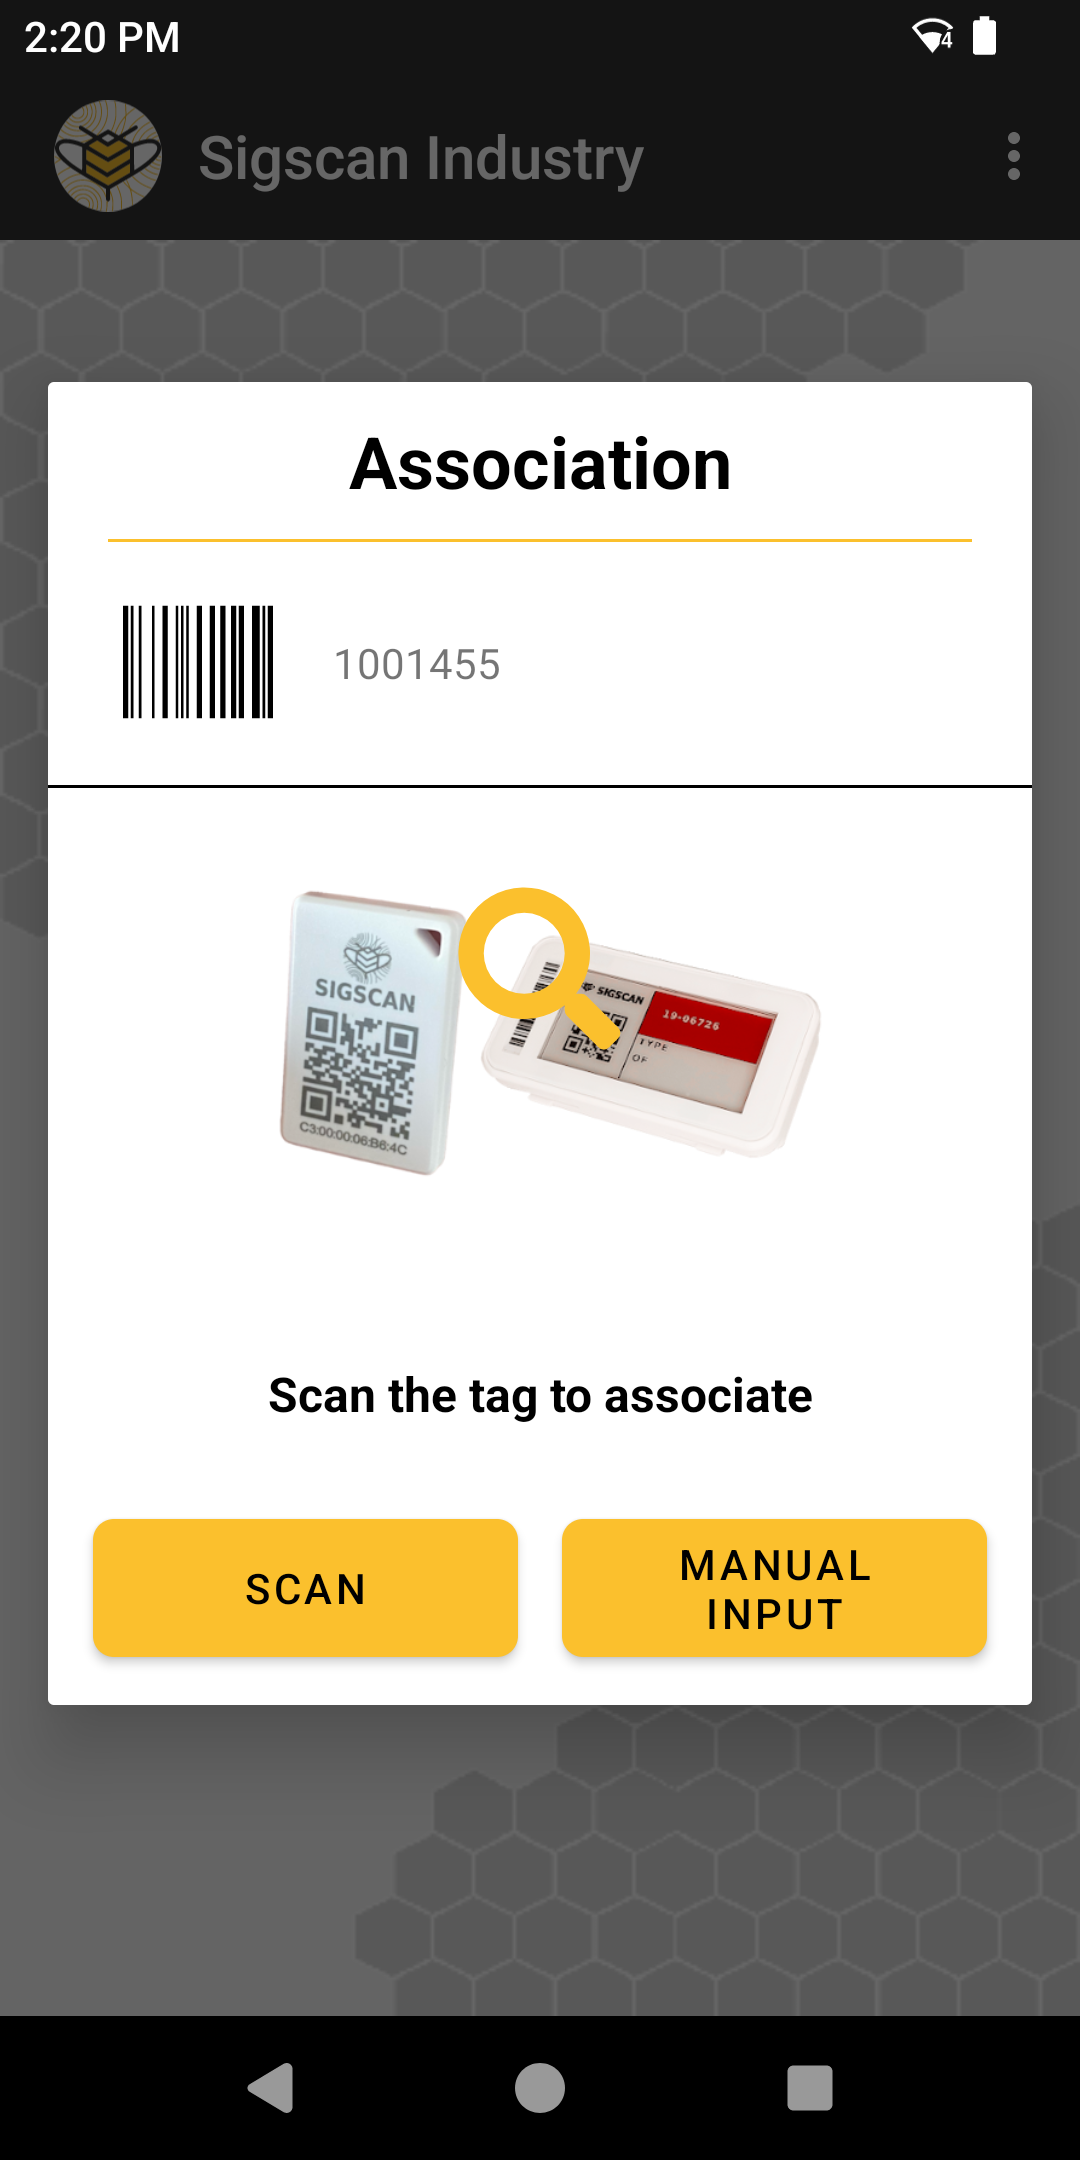
The mobile application lets you associate your tags with objects created in SIGSCAN, just click on associate a tag.
This procedure applies to active tags (BLE).
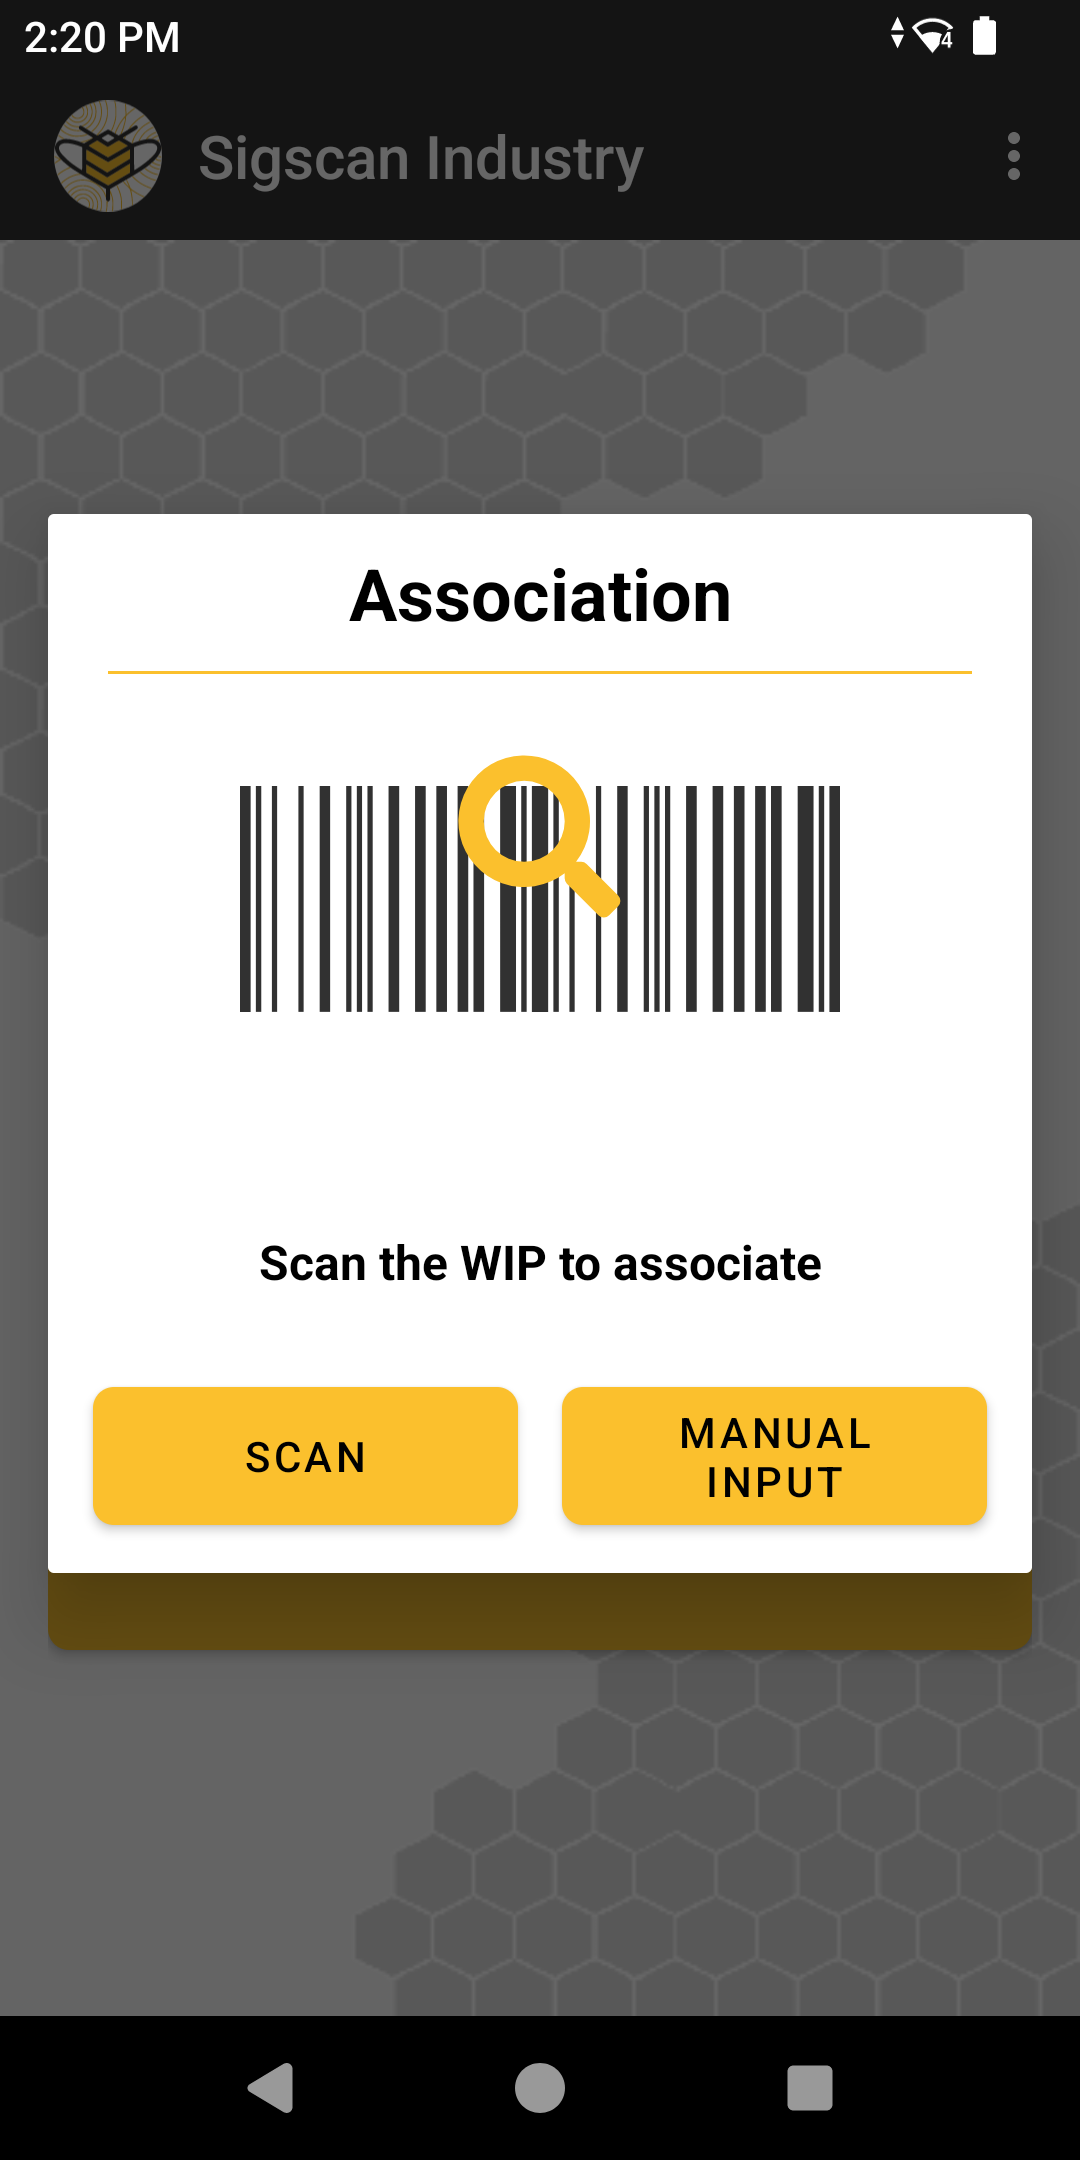
The association process starts by selecting the tool in SIGSCAN that you want to associate, click on manual entry to search your list for the tool (by default SIGSCAN only shows you unassociated tools). You can also scan a barcode showing the name of the object in SIGSCAN if it exists on the tool. Once you have selected the tool, you need to select the tag to which you want to associate your tool (the tag that you will physically affix to the tool). You can scan the tag identifier encoded in the Data Matrix (QR code) printed on the tag or search for the tag using manual entry.
At the end of the association process, you'll be taken back to the main menu, with a pop-up at the bottom of the screen confirming that your equipment has been associated.
Search a tool
The tool list section allows you to find a tool by consulting its position history.
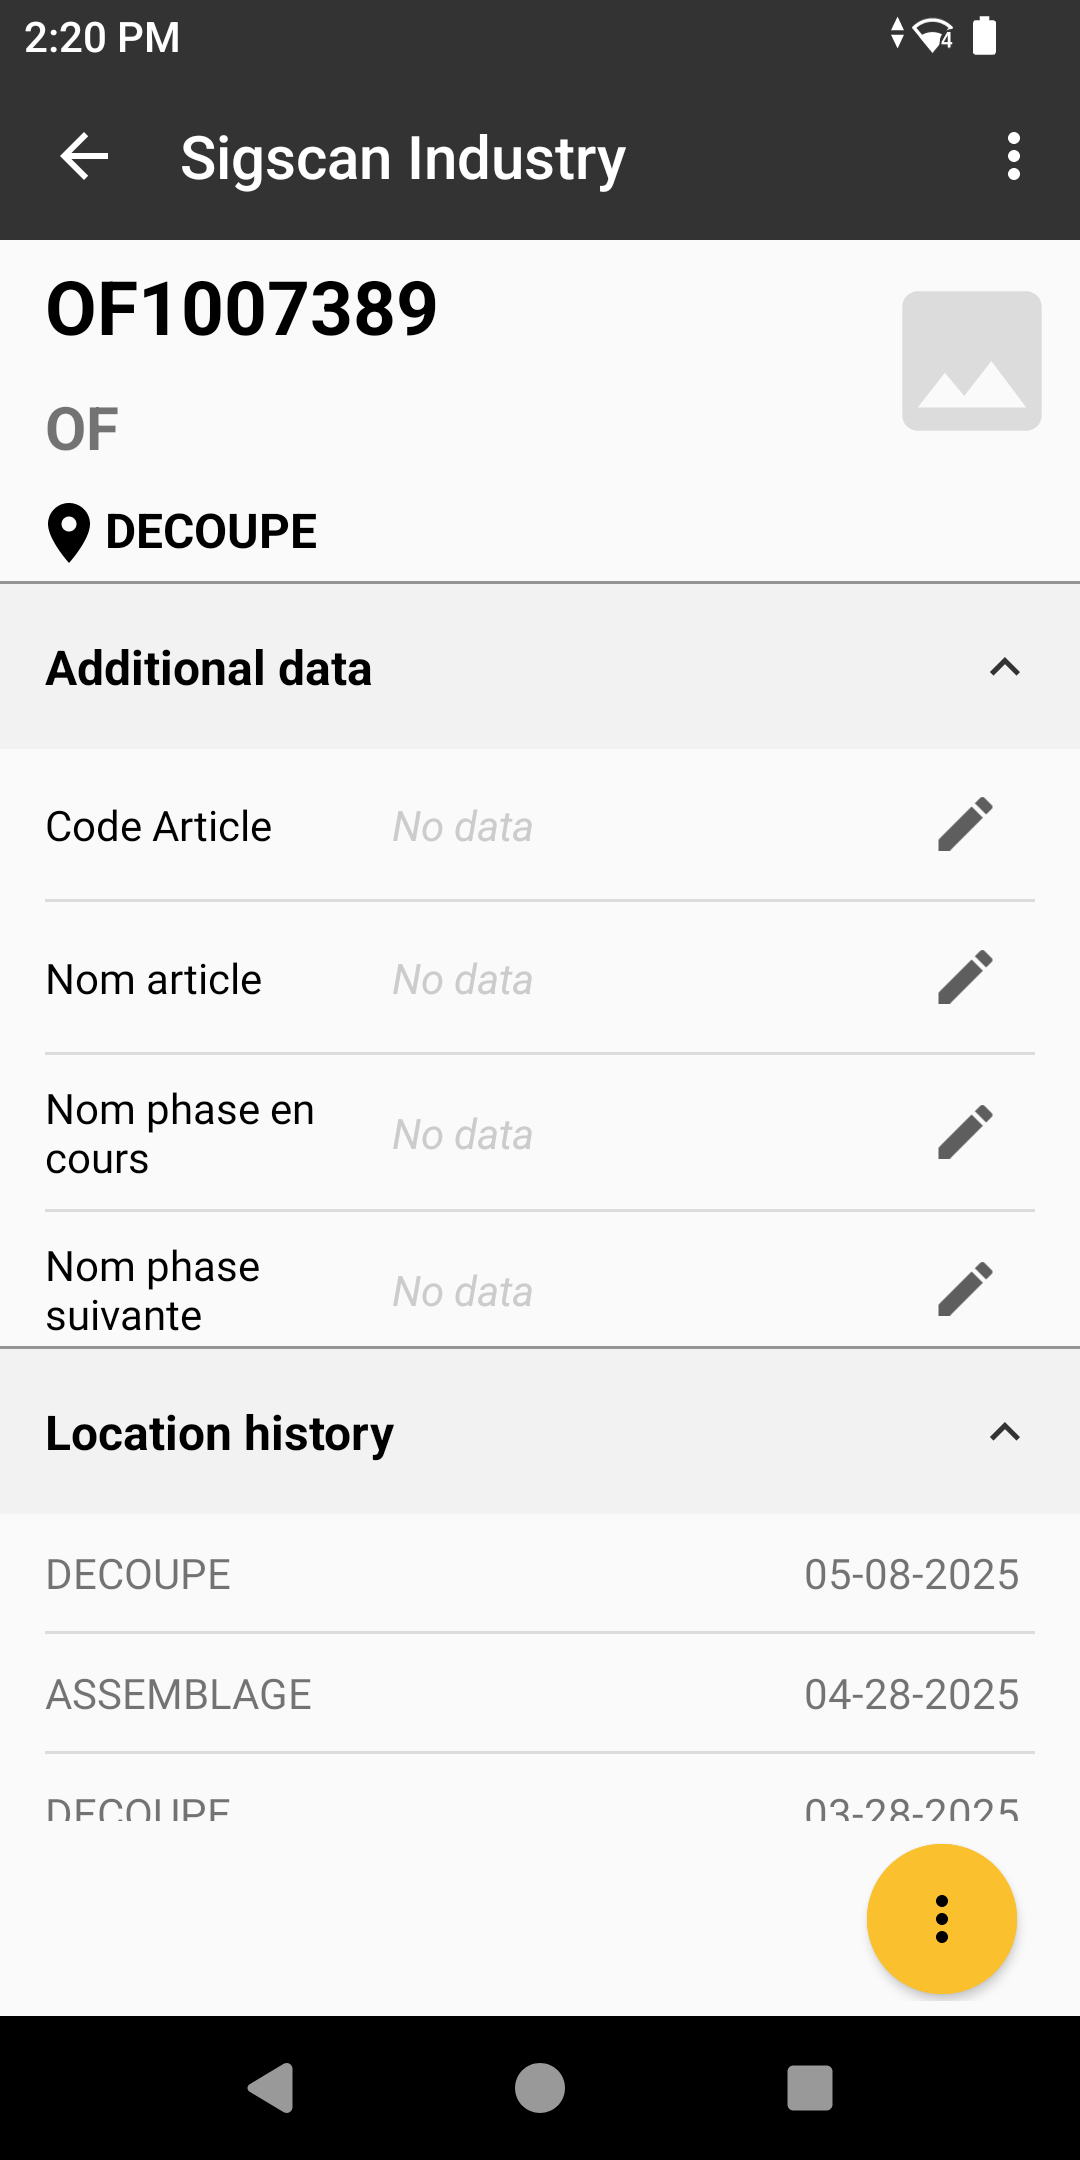
When you enter the tool list section, you will come to a complete list of your associated tools. Select one of them to enter the tool details.
You will see the main information about the tool, its name, its last position and the type (department to which it belongs). You can consult the tool's additional data in the ‘Additional data’ sub-section and edit it if you wish.
You can also find the position history of your tool in the location history.
Declaring positions from the application
The positioning of objects in SIGSCAN is at the heart of our solution. Depending on the type of tag, they are positioned differently.
Active tags (BLE): These emit a signal every 5 seconds that is picked up by various receivers in zones that you have configured. The positioning of BLE tags is therefore automatic, thanks to configurations made when the solution was installed.
Declaring positions from the mobile application lets you scan your tools and assign them a position.
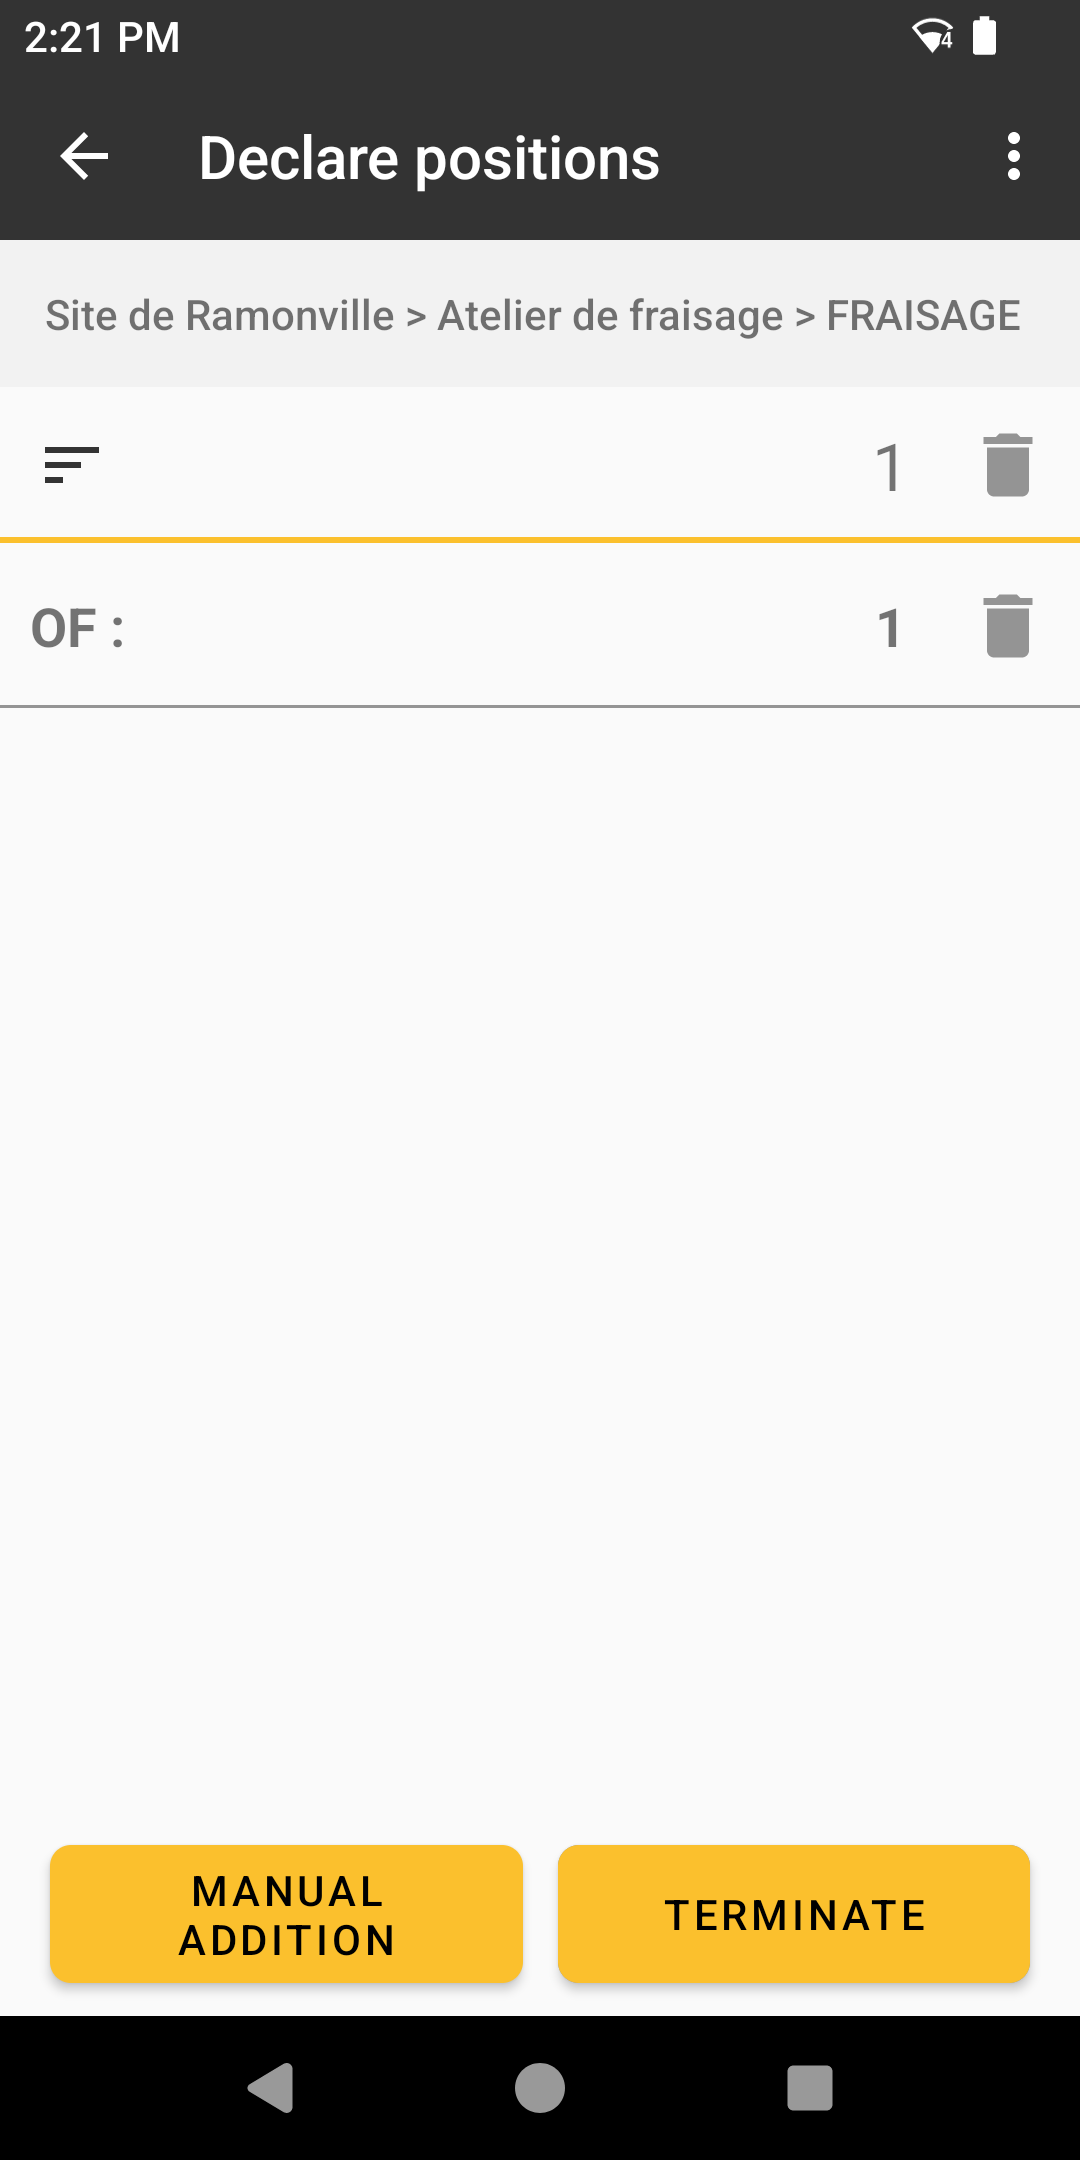
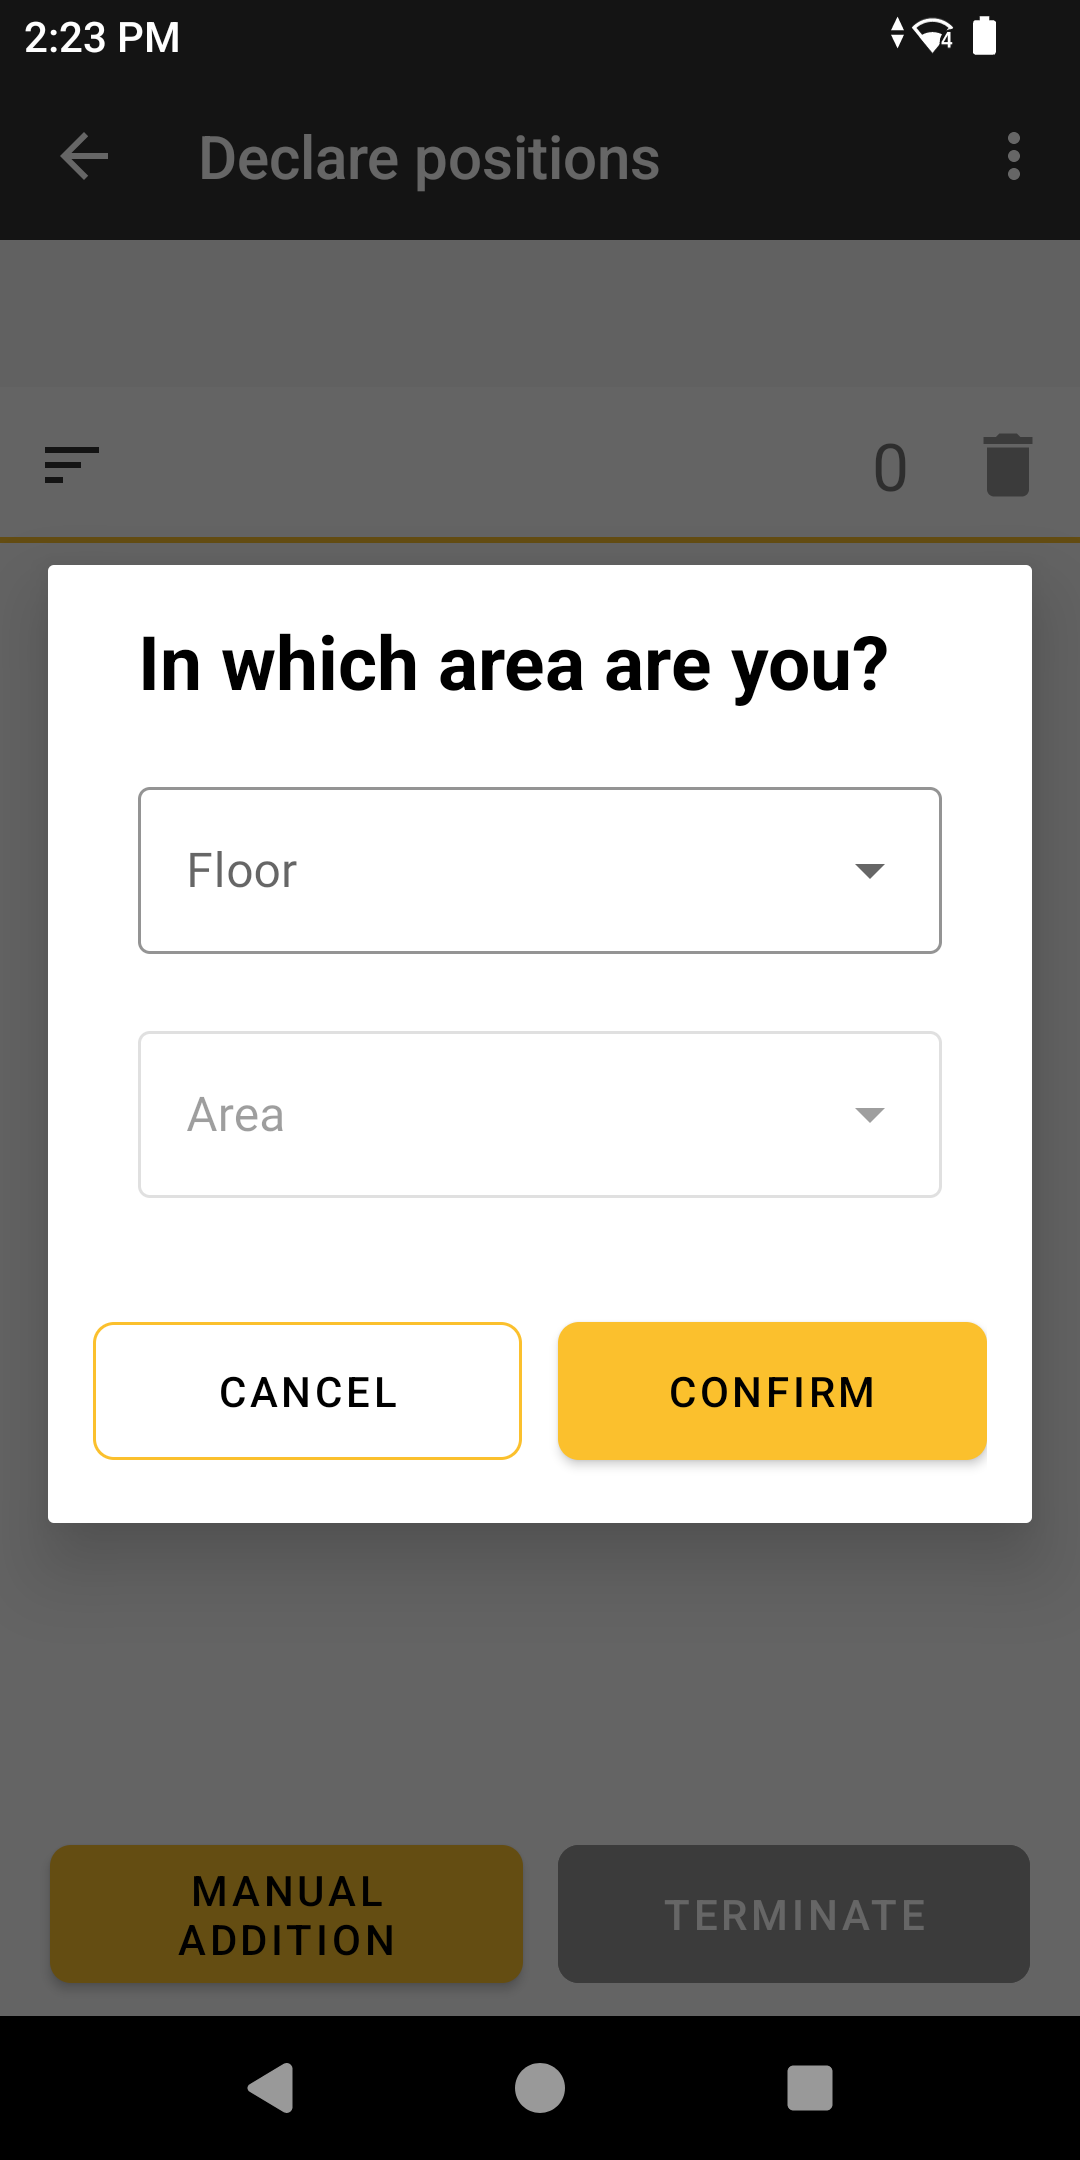
Click on Declare positions, indicate the zone you want to assign to your tools, click on Manual entry and enter the floor and zone you want.
Scan or manually select the tools for which you wish to declare a position.
Confirm your selection after checking that everything is correct, and the application will return you to the main menu with a confirmation pop-up at the bottom of your screen.
Dissociate a tool from the mobile application
From the tool unlink option on the mobile application you can unlink any type of tag, by scanning the MAC address present on the tag or manually searching for the tag name in the tag list.
Once selected, the tag is unlinked directly and the application returns you to the main menu.
Create a new object from the mobile application
To create a new object on the fly from the SIGSCAN industry application, you need to change a setting in the application.
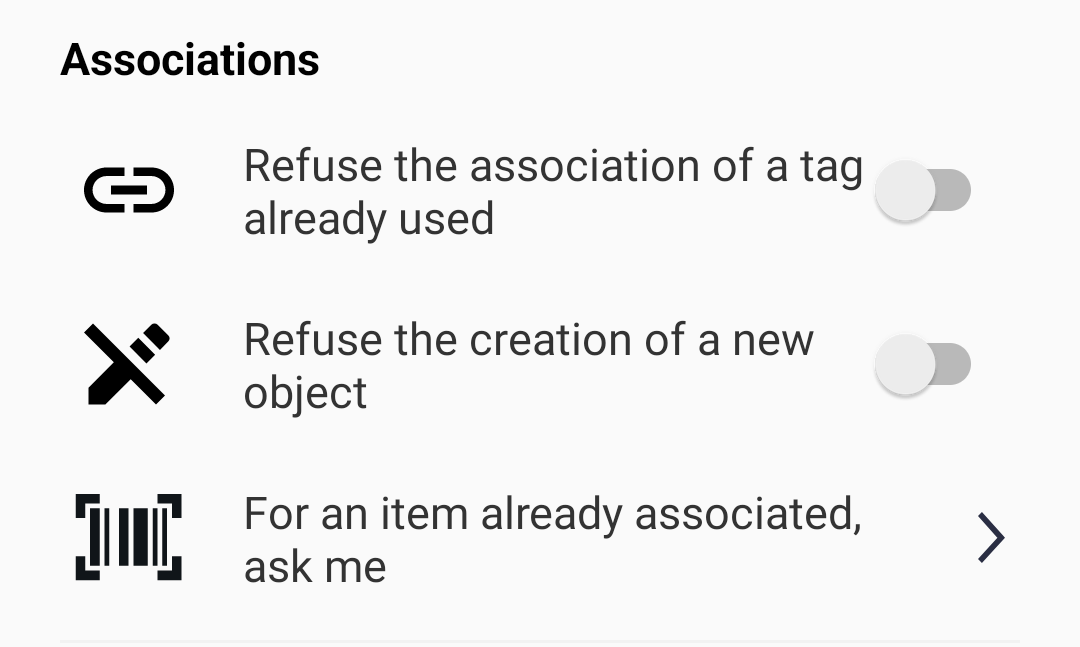
To activate this setting, click on the 3 dots at the top right of the application and go to the settings tab. Once in the list of settings, scroll down to the Associations section and deactivate the ‘Refuse new object creation’ option.
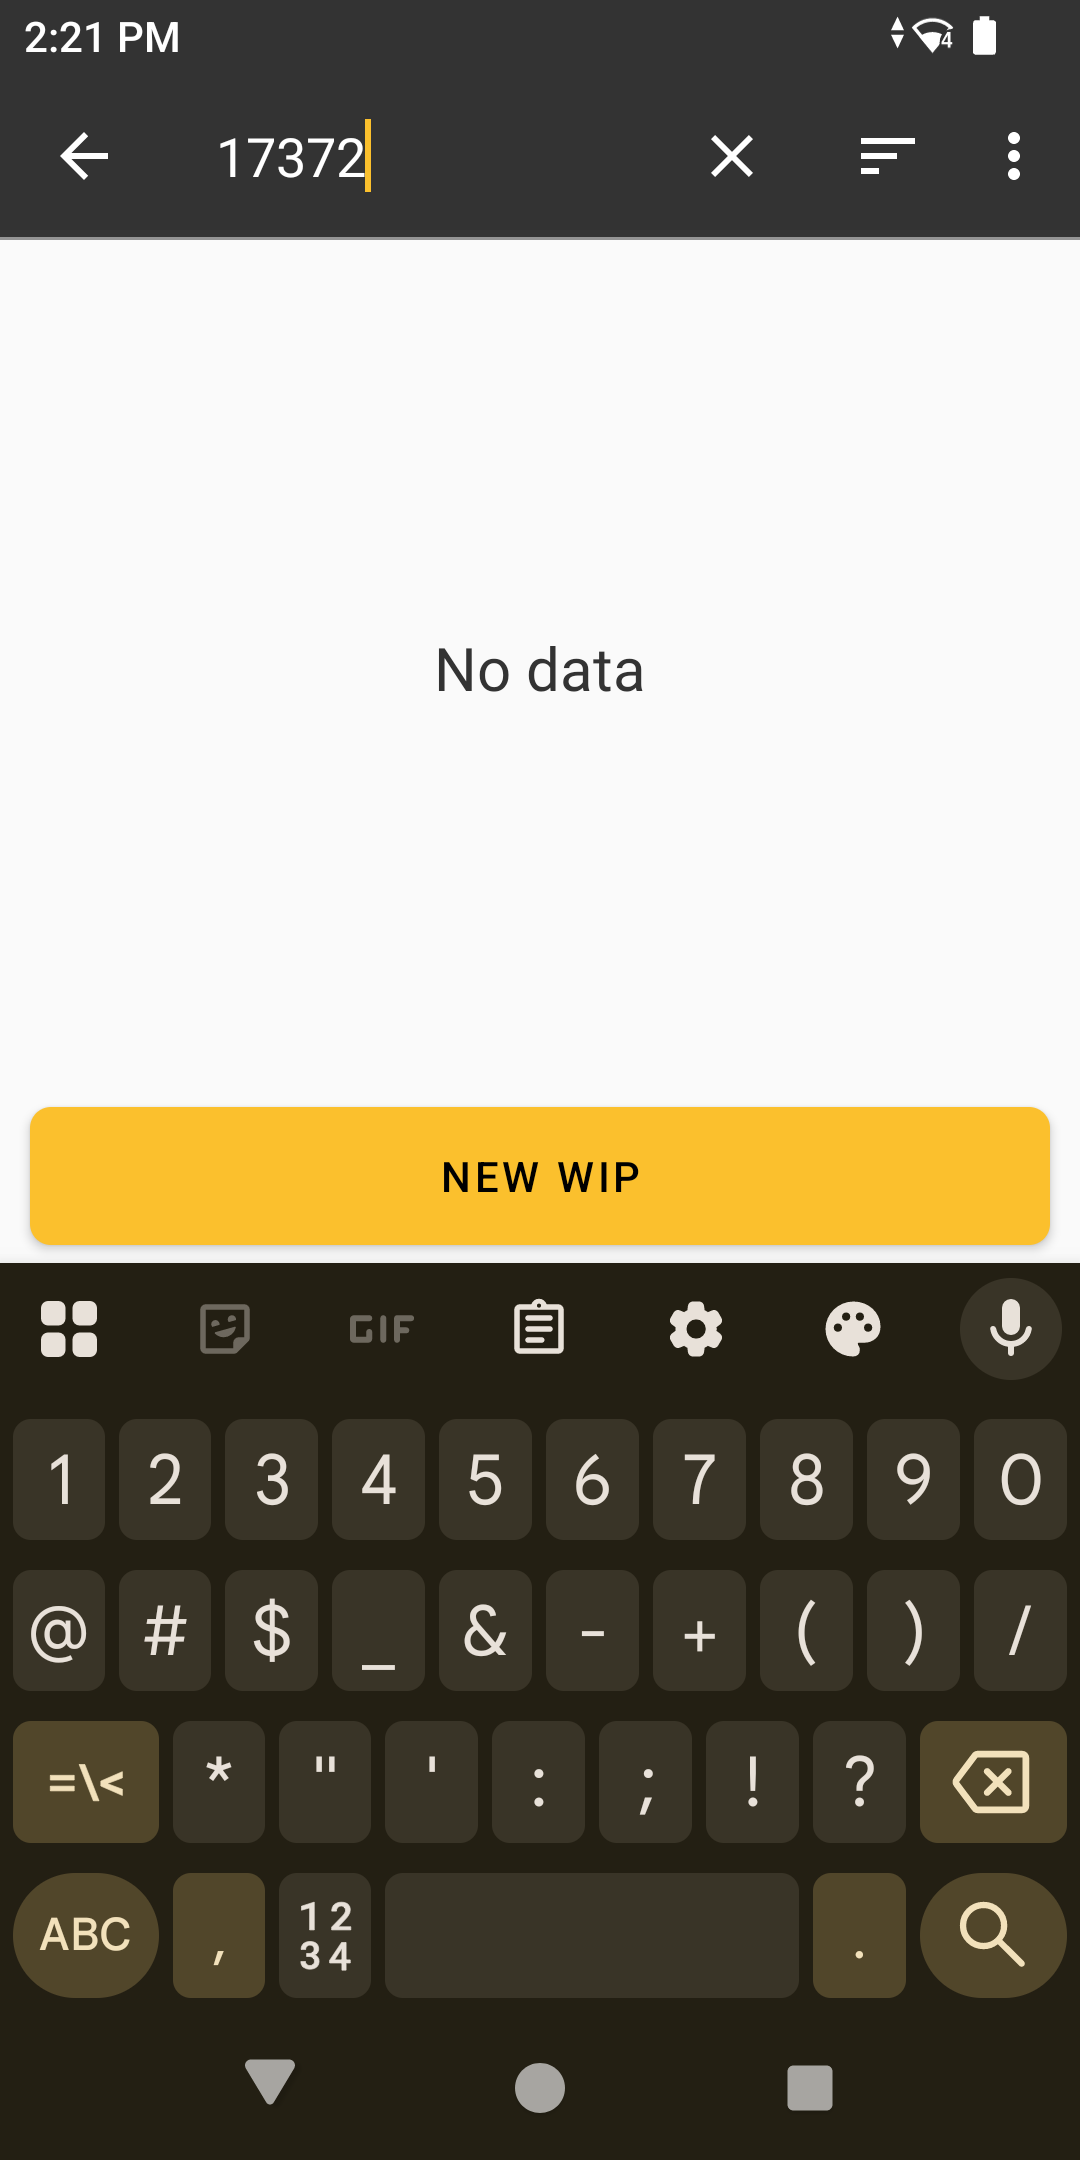
Then go to the object association menu and search for an object by manual entry, enter a non-existent object name, when you enter a non-existent object name the application will suggest that you create a new object.
Once you have done this, click on New object. Before continuing with the process of associating your new object, you will be redirected to a page where you can fill in additional information about the object (type, configurable fields, etc.).