Inventory Industry
WEB interface
The web interface for the inventory section is mainly for configuring the module and viewing your stock or furniture inventories.
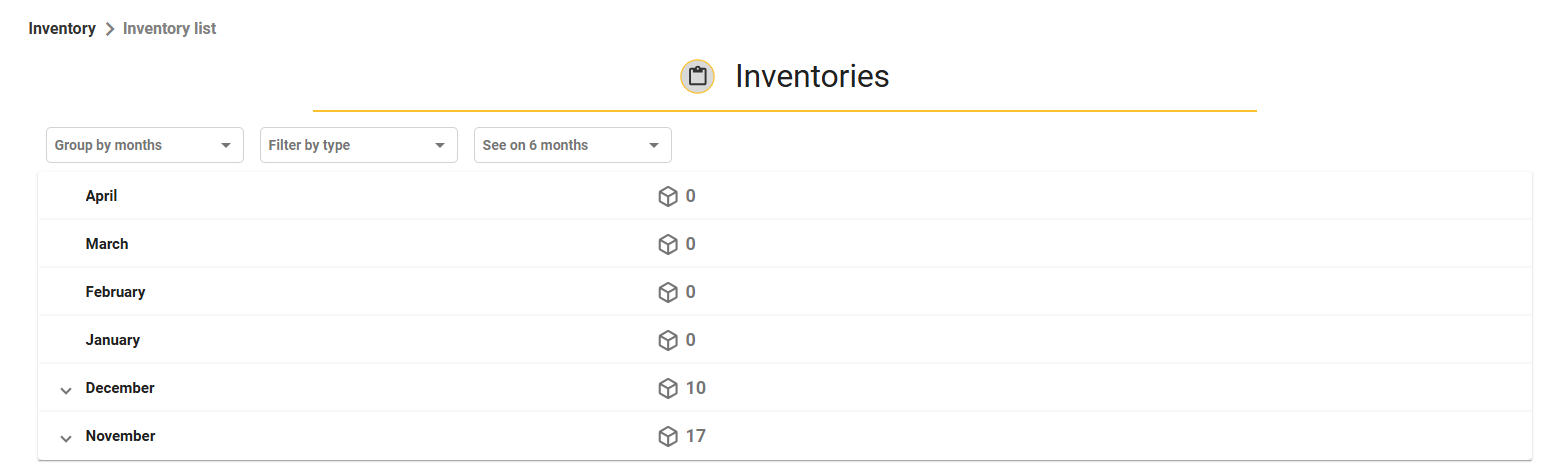
Inventory list
The inventory list tab lets you view the different inventories carried out on your stock or furniture. Inventories are sorted by month by default, but this filter can be changed using the first button above the list. Other filters allow you to organise your lists of items in your inventories (by zone or by type). By clicking on the number of items in your inventory, you can go into the details of your inventory and view the objects in it.
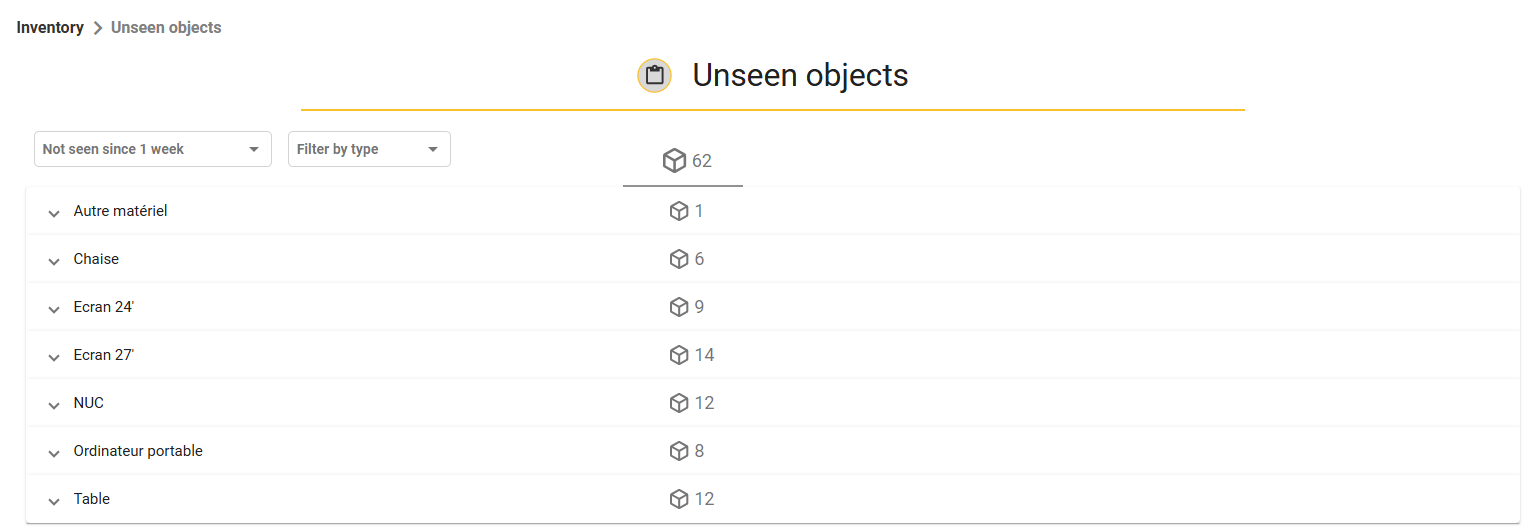
Unseen objects
The unseen objects tab lets you take stock of objects that have been unseen for a period of your choice. The default value is 1 week, but this can be changed using the filter above the list. With this list, you can quickly identify unseen equipment or areas that have not been inventoried for a long time.
Note: Inventory objects are tracked by passive tags, so they are only seen when they are read by a nearby RFID reader.
Objects are classified by type by default, but you can also classify them by zone.
Go to object details
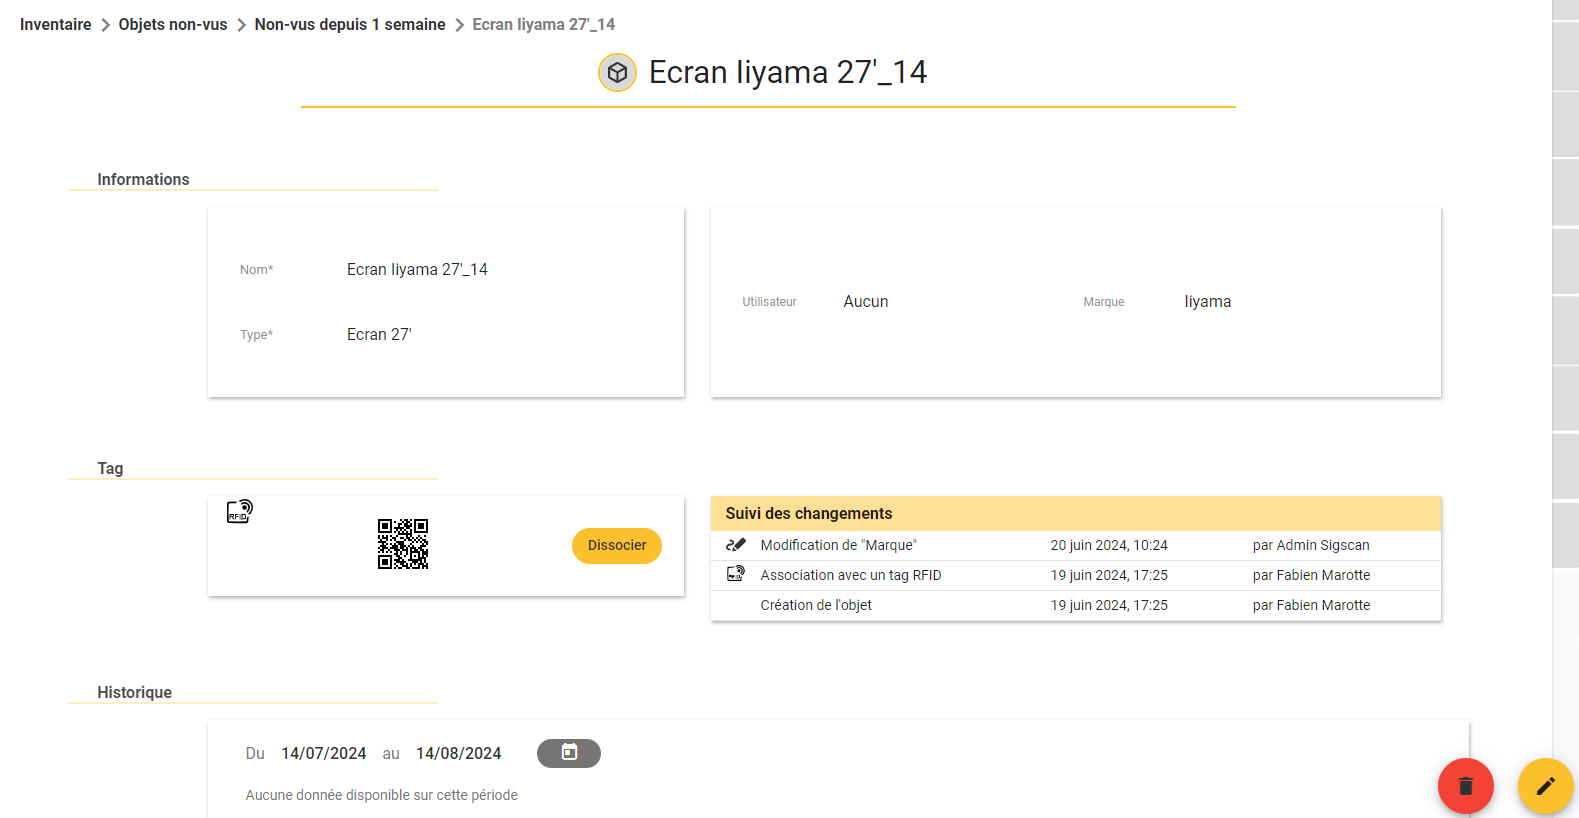
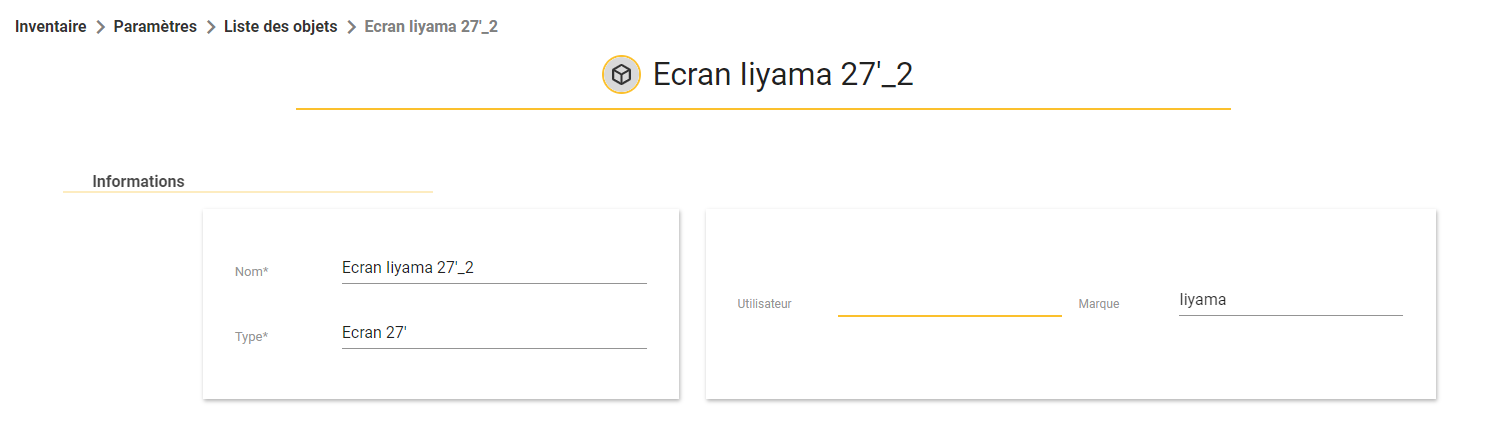
The WEB interface also allows you to consult the details of an object, as an object may have additional information fields. The object details also give you additional information such as the identifier of the associated tag or the position history.
To access the object details, click on the number of items in the inventory list icon  . Once in the list, click on one of the objects in the list.
To edit the object's fields, click on  at the bottom right of the screen. Once you have made your changes, remember to confirm them.
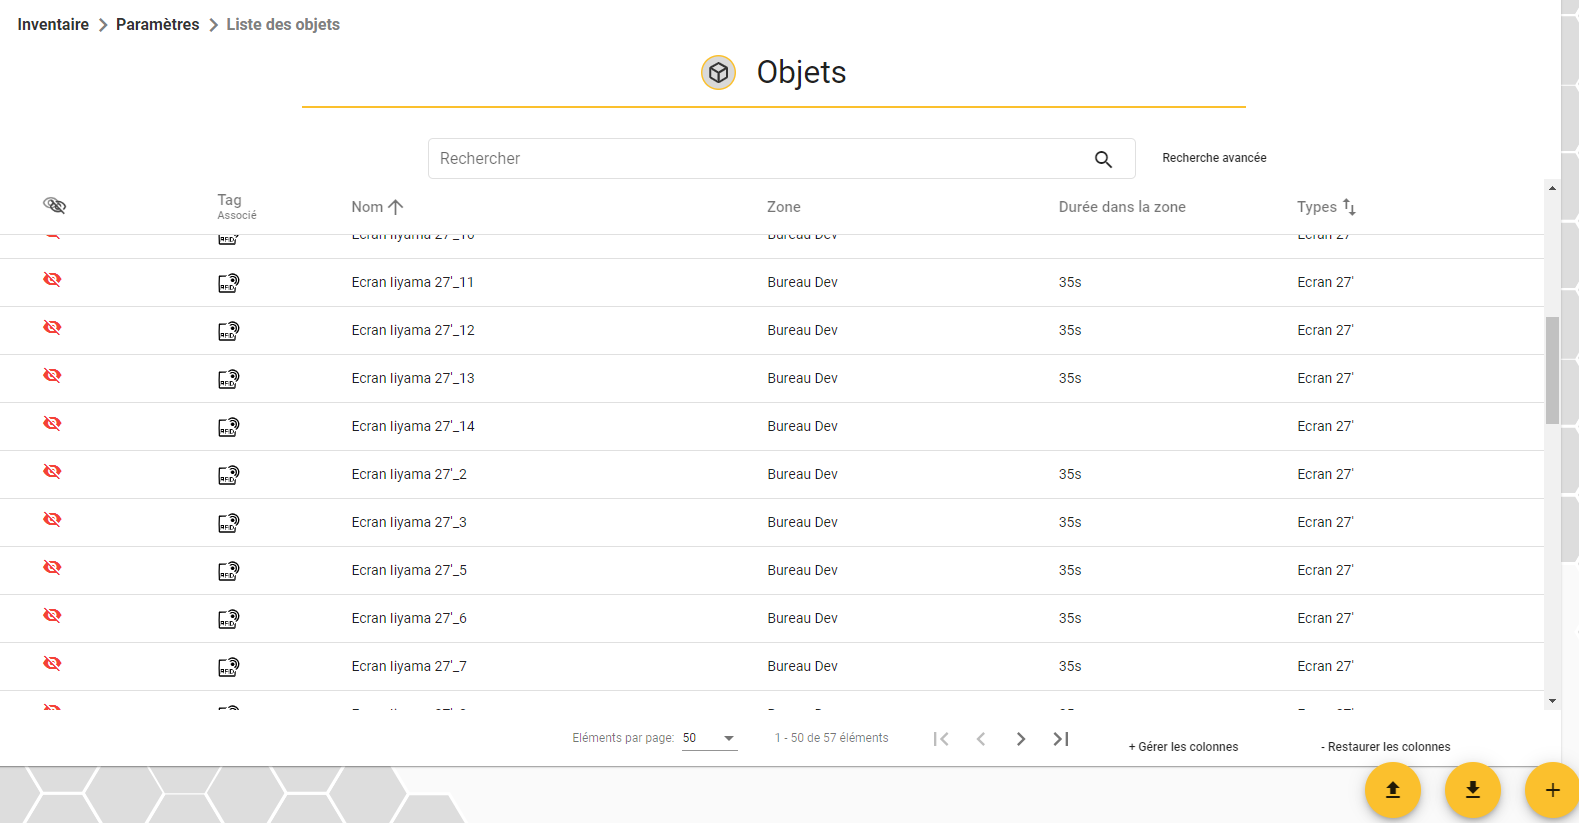
If you are looking for a specific object, you can search your object list. To do this, go to the Parameters submenu of the Inventory module and go to the Object list page. In this list you'll find all your objects, and a search bar will help you find a specific object quickly (a filter is applied by default to associated objects).
Modifying object fields
Your administrator may authorise you to edit the additional fields in the object.
To edit the object's fields, click on  at the bottom right of the screen. Once you have made your changes, remember to confirm them.
If you are looking for a specific object, you can search your object list. To do this, go to the Parameters submenu of the Inventory module and go to the Object list page. In this list you'll find all your objects, and a search bar will help you find a specific object quickly (a filter is applied by default to associated objects).
Mobile application
The mobile application supplied with the mobile terminals is central to the use of the Inventories module. Thanks to the mobile terminals, you can carry out your inventories anywhere in your establishment, provided you are connected to the network.
The mobile application enables you to carry out all the essential actions for your inventories:
Object association
Make an inventory
View and modify the details of an item
Search for an item
Unlink an item
First, make sure that you are in the inventory module of your application. To do this, go back to the module selection page and select Inventory.
Link an object
There are 2 types of association for the inventory module, association with an existing object in SIGSCAN or association on the fly by creating objects by type when associating. If you have previous inventories, you can import them into SIGSCAN and use them to tag your equipment. If you don't have any previous inventories, you can identify object types and the SIGSCAN software will automatically create objects with a generic name, allowing you to simply build an initial inventory list.
Associate an existing object
If you have a list of pre-registered objects, the association process is as follows:
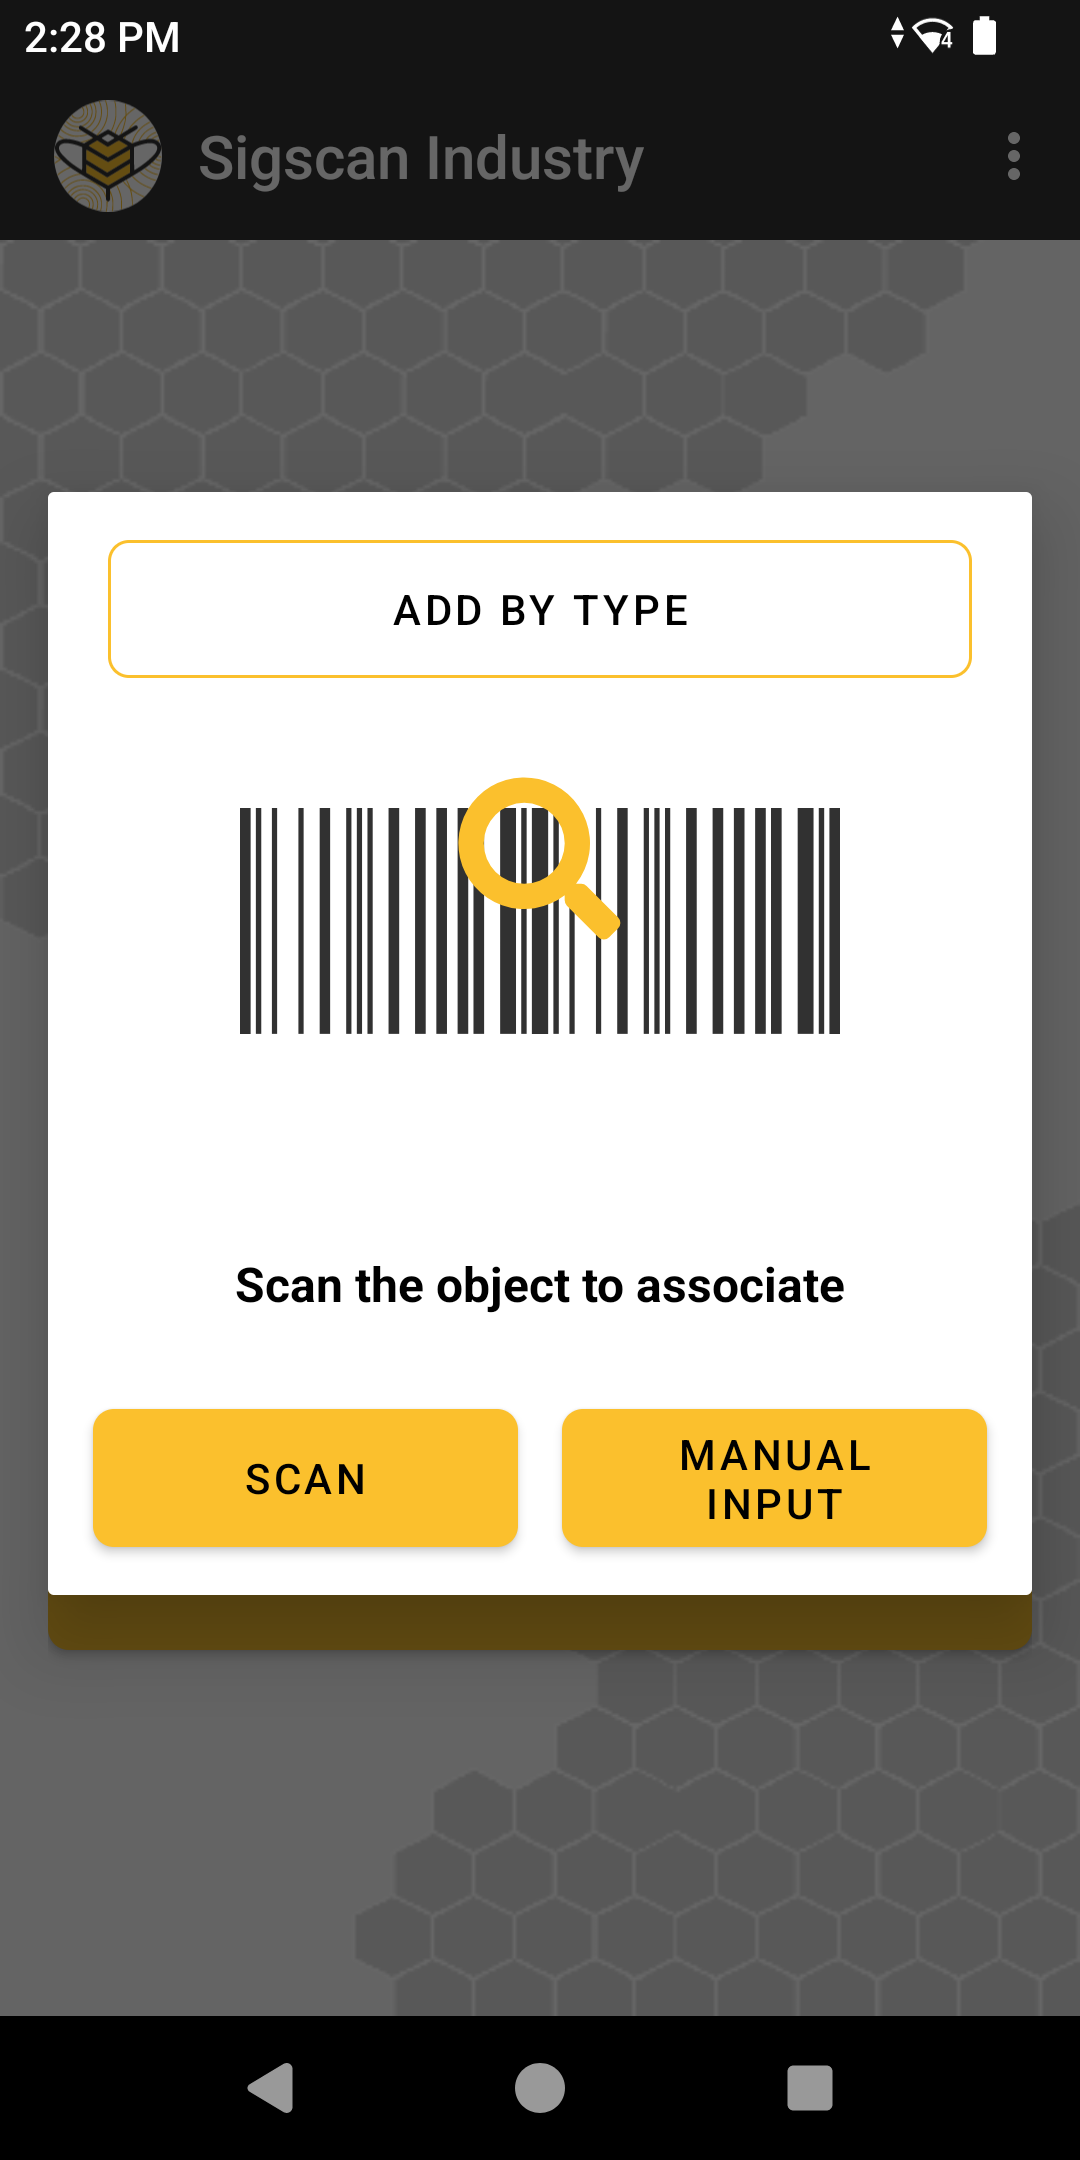
Click on association, you must select the object you wish to associate, click on manual selection. You are now on the list of your non-associated objects (editable filter), select the object you want to associate.
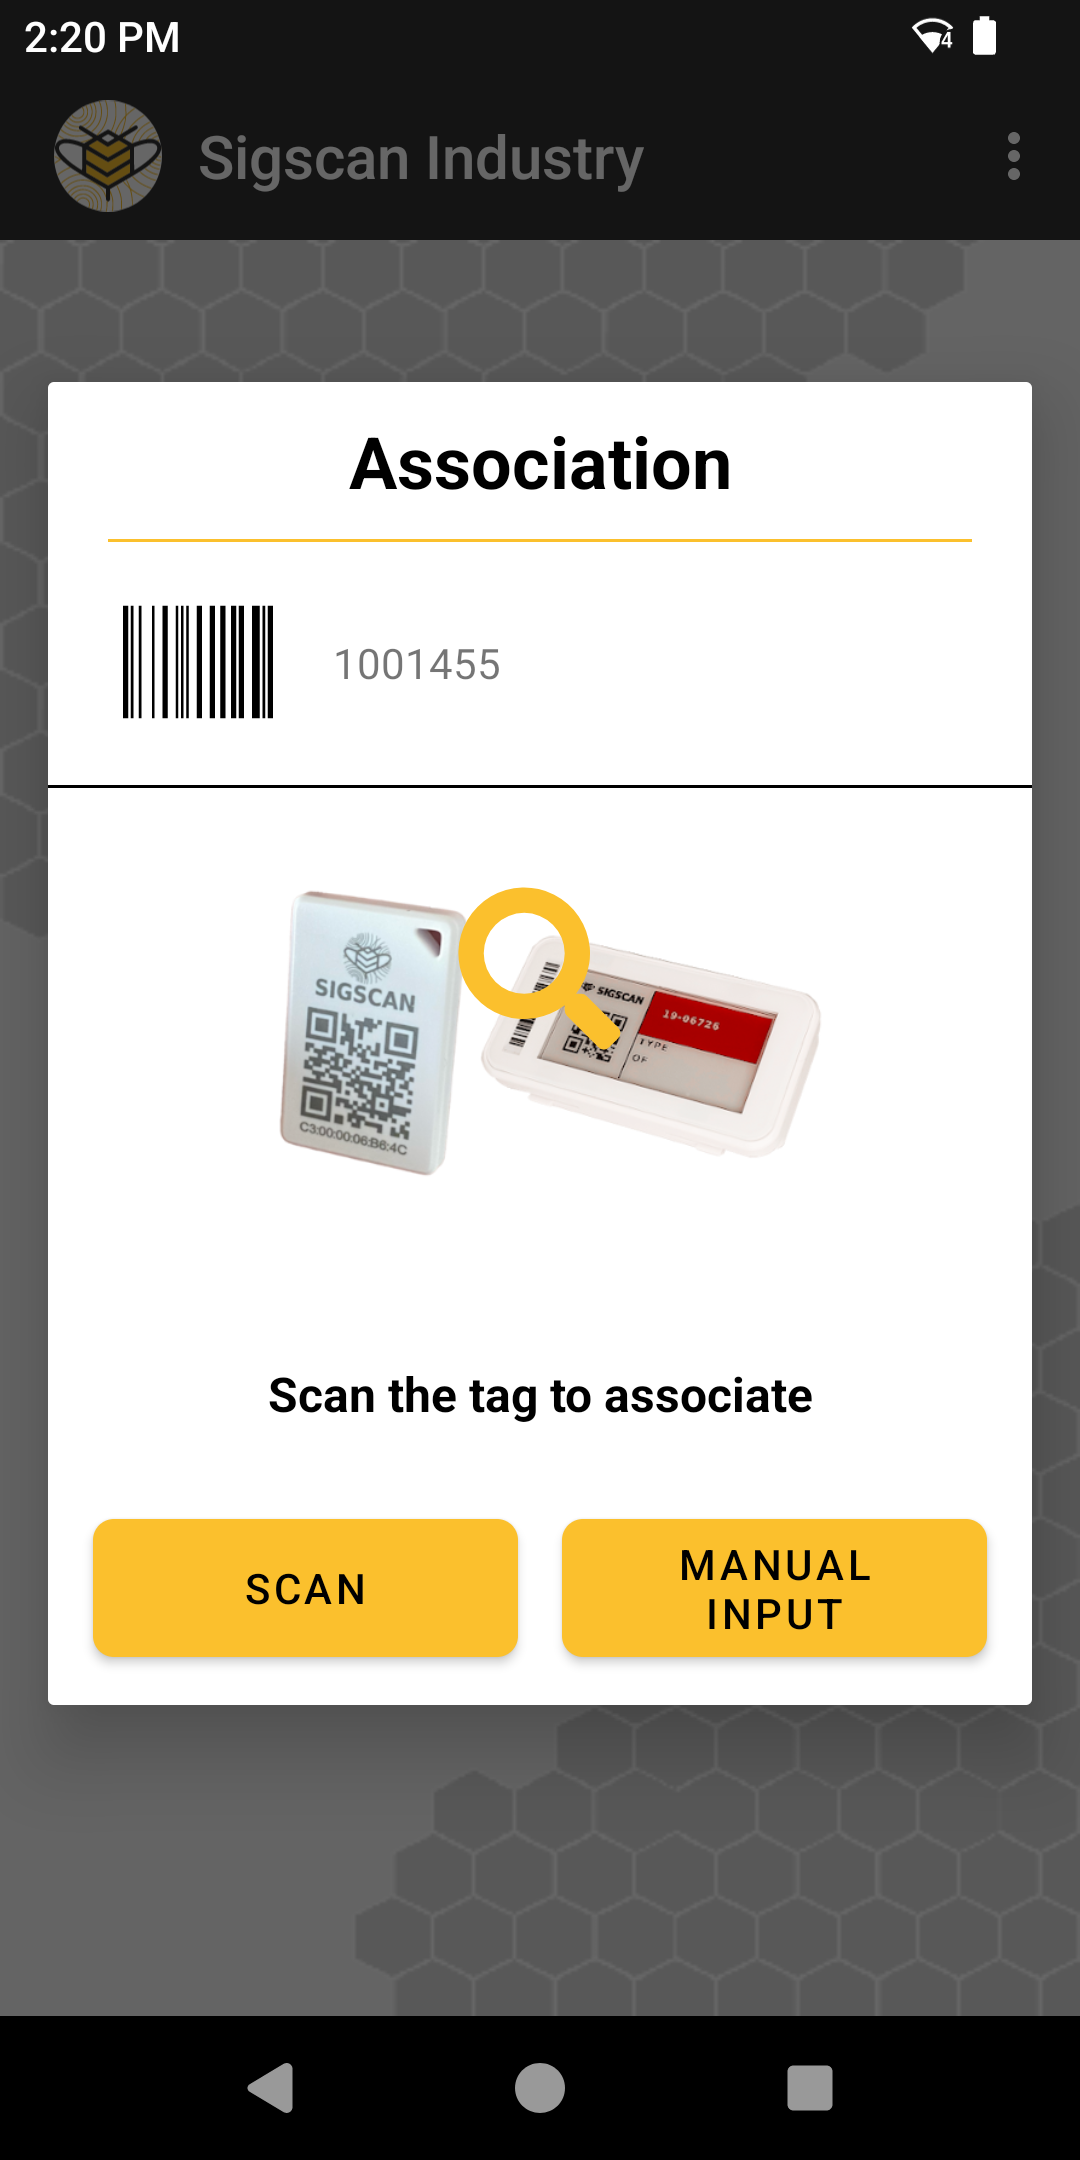
You now need to identify the tag you want to associate with it. Scan the Data Matrix (QR code) printed on the tag. Once the scan is complete, the association is taken into account and the application returns you to the main menu with a confirmation message.
Associates no existing object
If you do not have a pre-registered list of objects to associate, the association process is as follows:
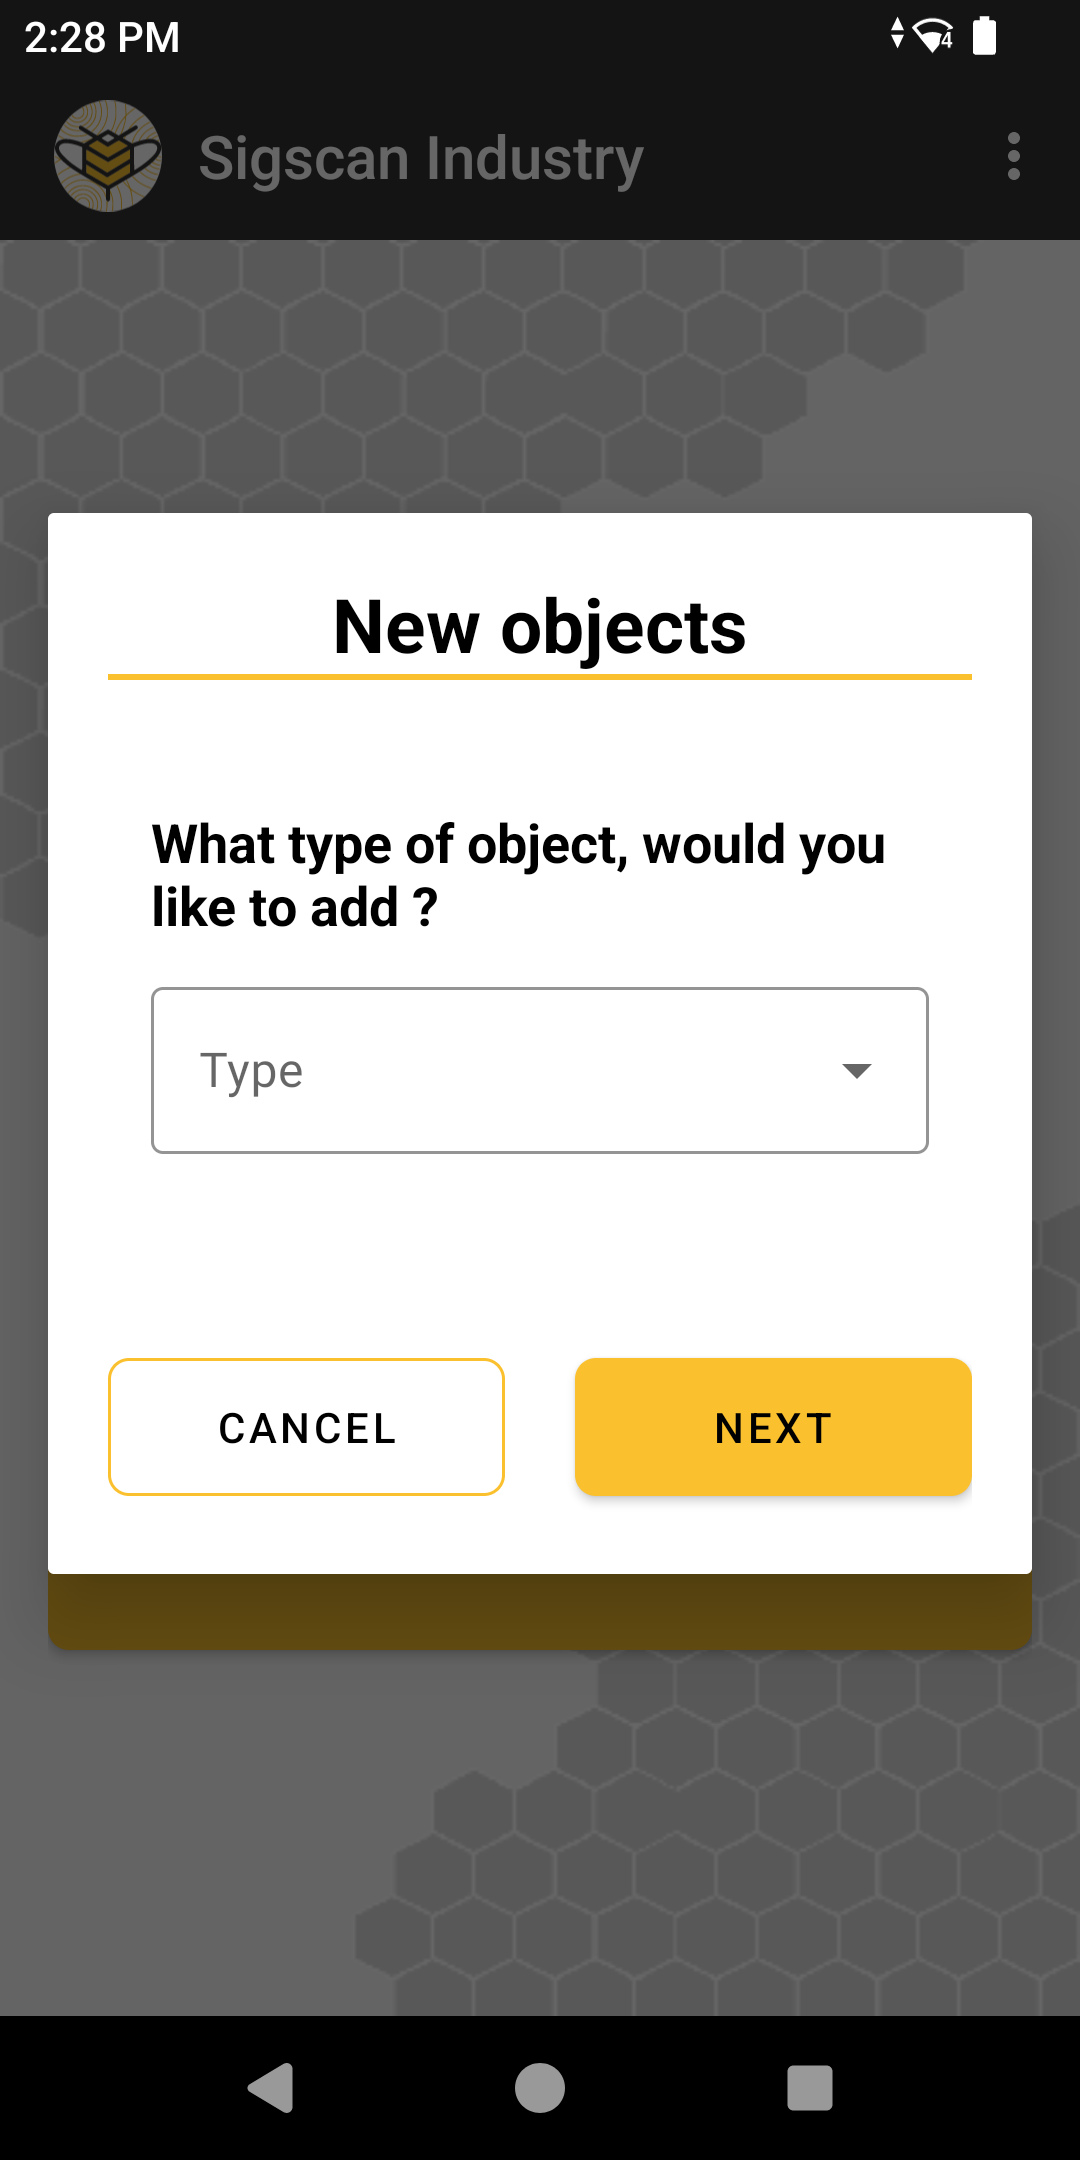
Click on the Association button, on the pop-up select the Add by type button at the top. Select the type of object you wish to add; object types are created when the inventory module is configured.
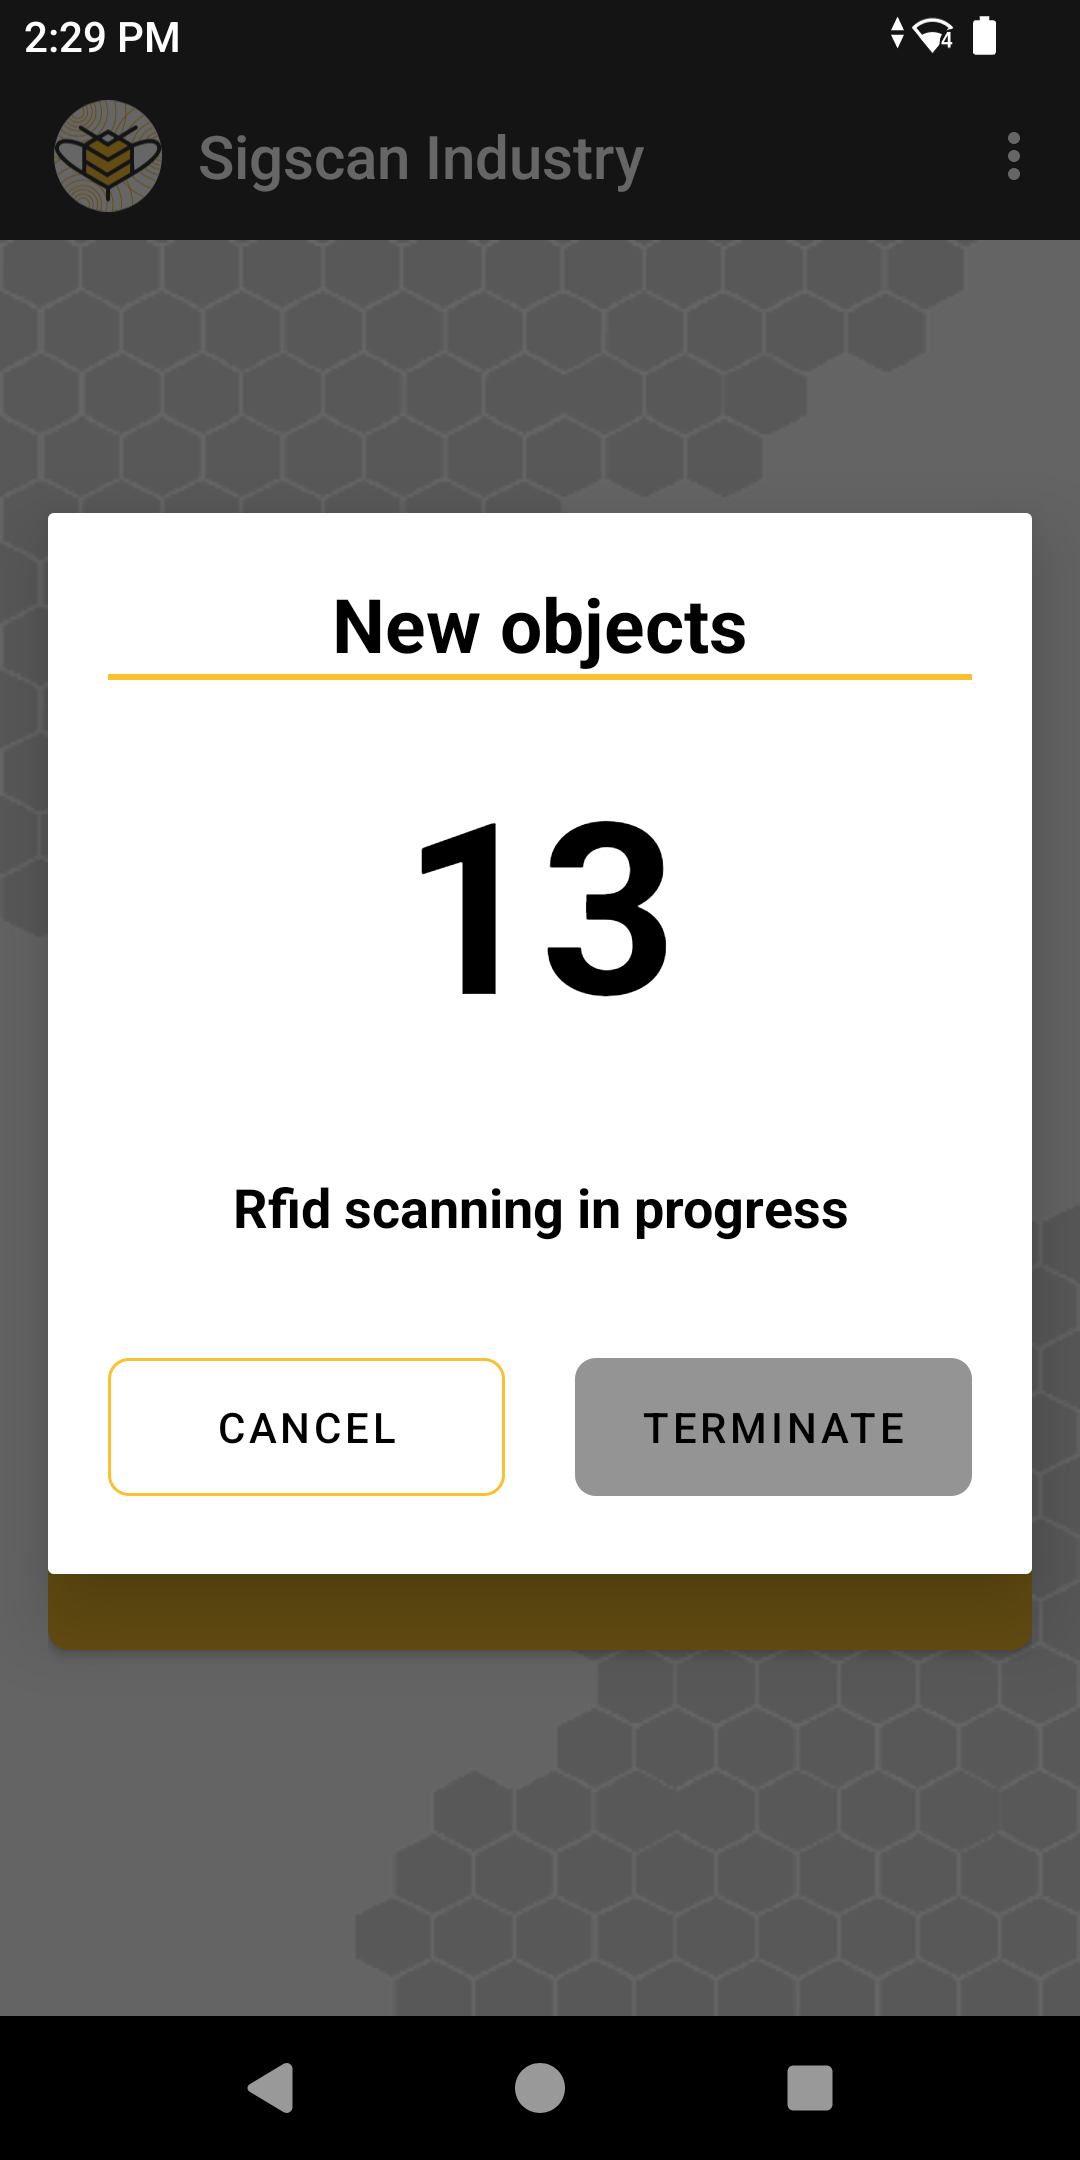
Once you have chosen the type, you need to scan the tags you wish to associate using the top trigger of your mobile reader.
Warning: isolate the tags you want to associate to make sure you don't scan more than the tag you need.
Once you have completed your scan, click to confirm the creation of objects of the selected type. Once validated, the application will return you to the main menu with a confirmation message.
Making an inventory
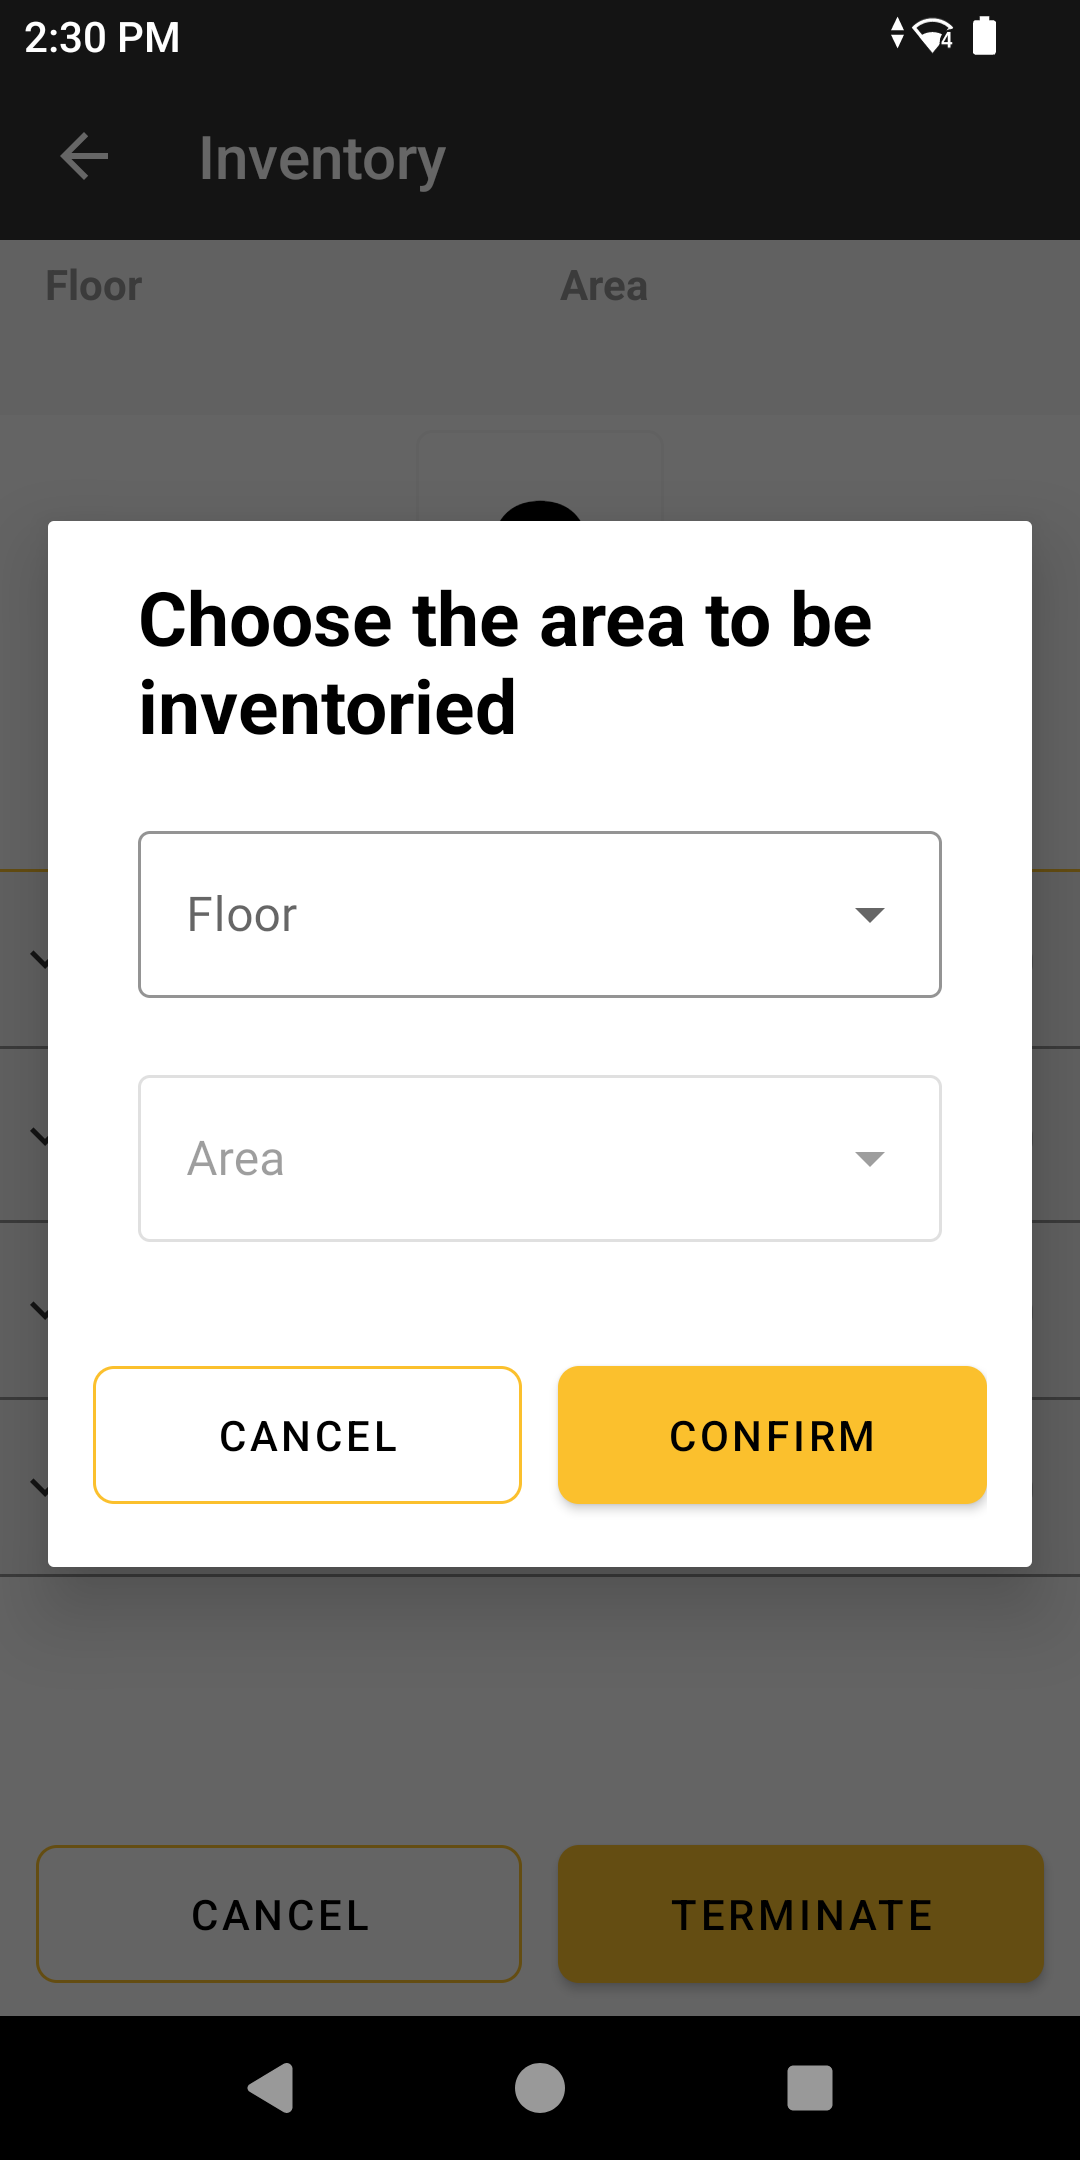
To carry out an RFID inventory using a mobile reader, click on the Inventory button. Select the zone you wish to inventory (the objects you scan will be placed in this zone, if you change zones start the procedure again).
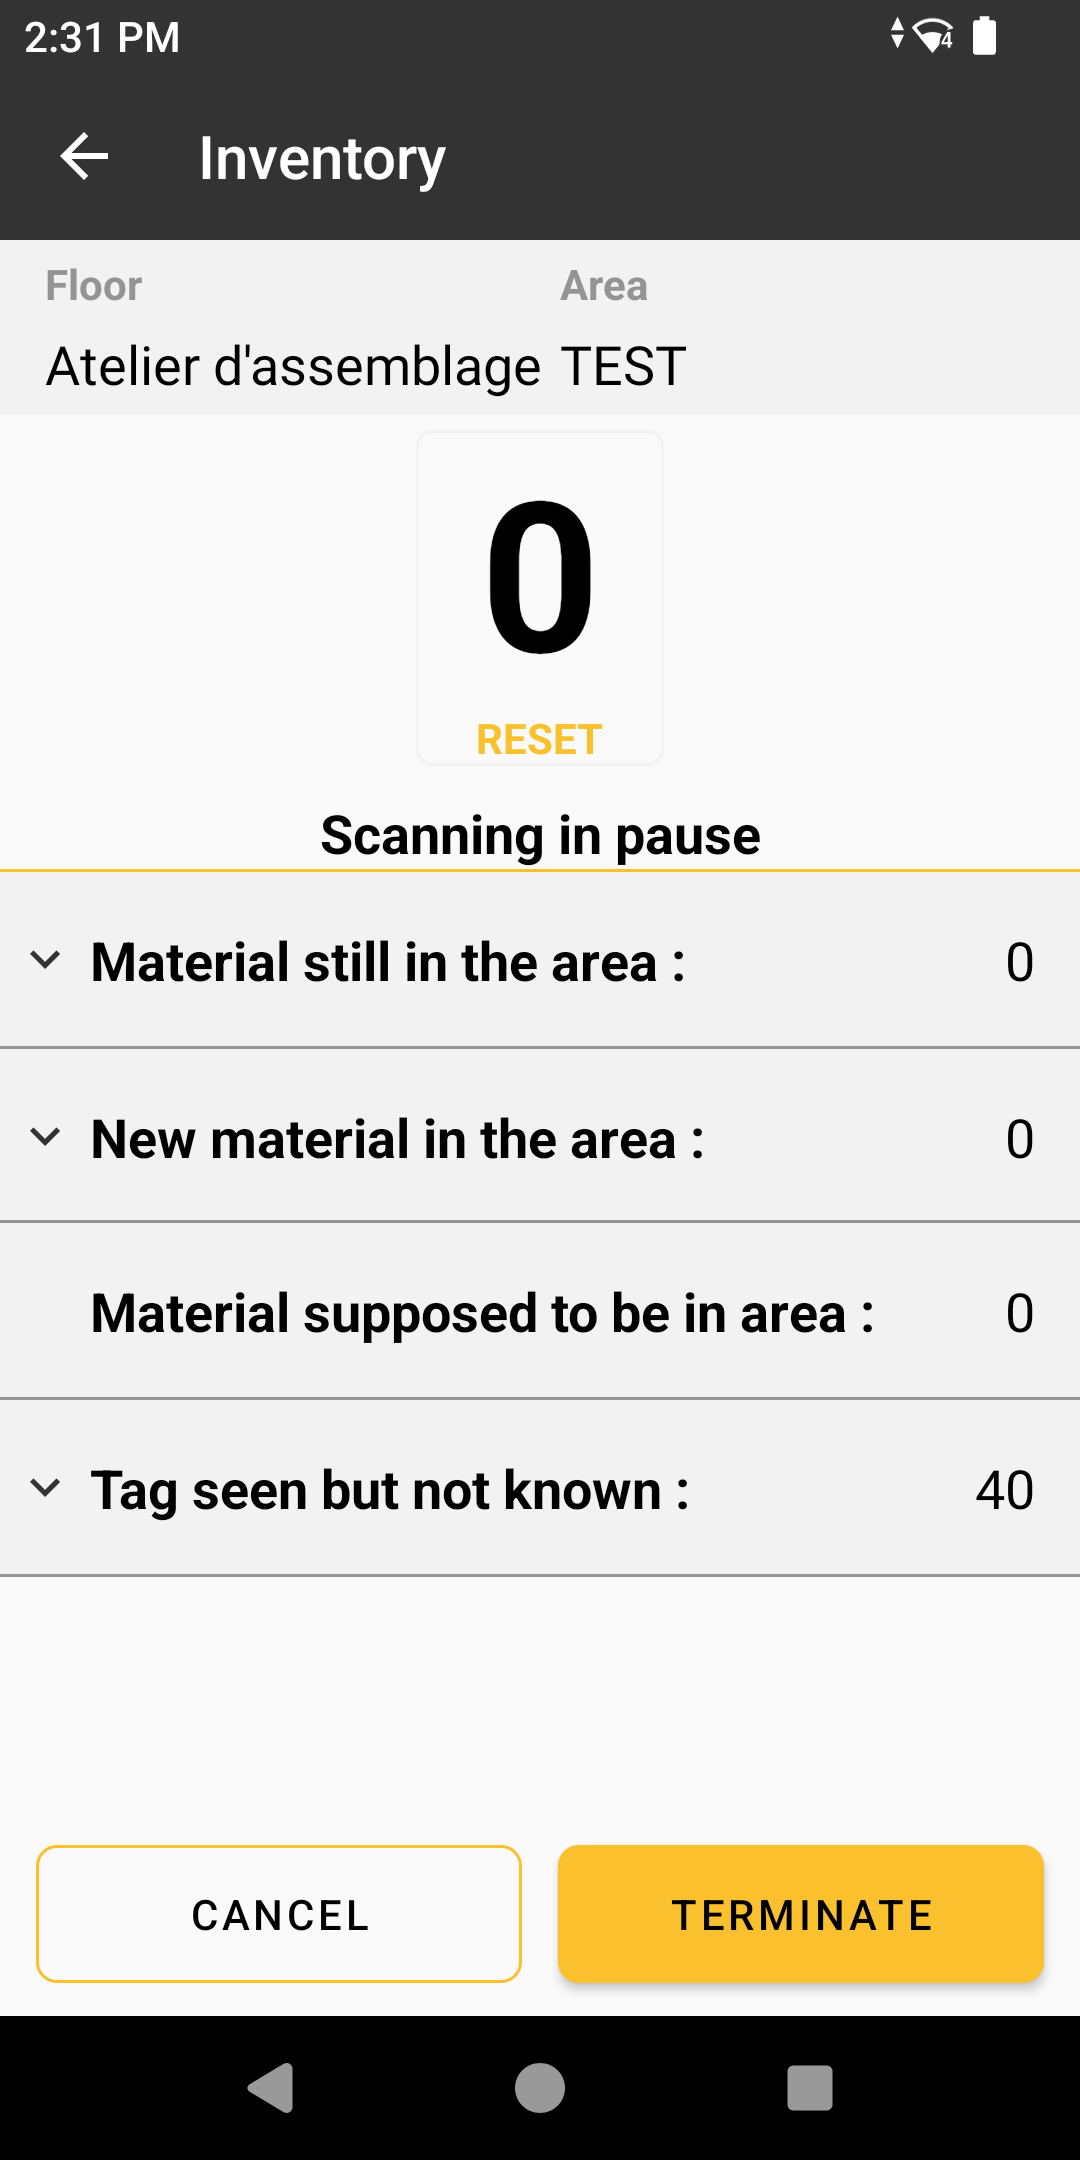
Click on start and begin scanning the area with the trigger of your mobile scanner. You will then see the objects you are scanning appear in the various sections of the page:
Equipment still in the zone → was already inventoried in this zone
New material in the zone → is newly inventoried in this zone
Material supposed to be in the zone → ...
Tag seen, but not known → Tag not associated with objects
You can view the details of these categories object by object. Once your zone inventory is complete, finish your inventory and confirm.
Find an object
The Search for an object section lets you find an object by consulting its position history, and also enables you to perform short-range detection for passive tags (RFID).
When you enter the search for objects section, you'll come to a complete list of your associated objects. Select one of them to go into more detail about the object.
You will then see the object's main information, its name, its last position and the type (department to which it belongs). You can view the object's additional data in the ‘Additional data’ sub-section and edit it if you wish.
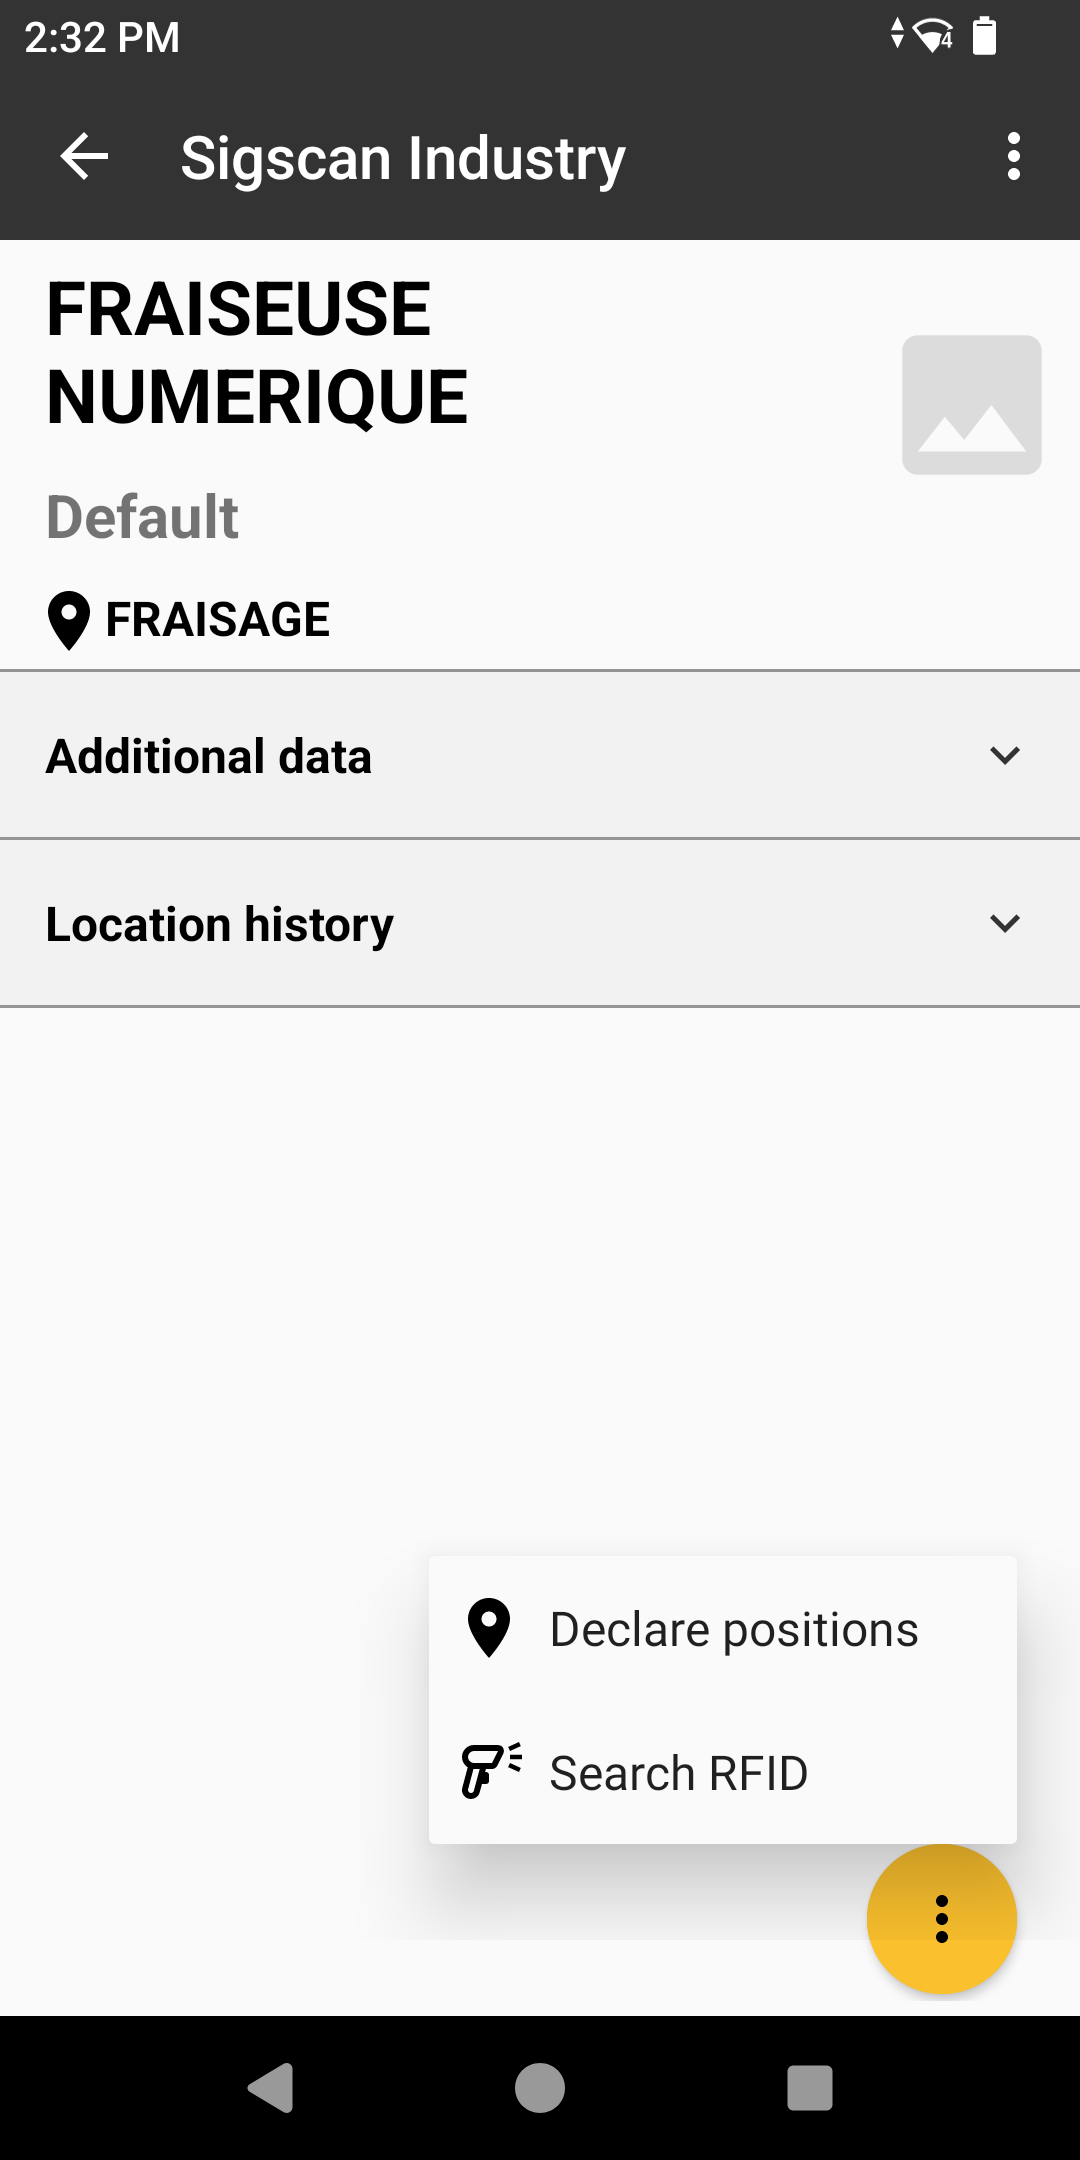
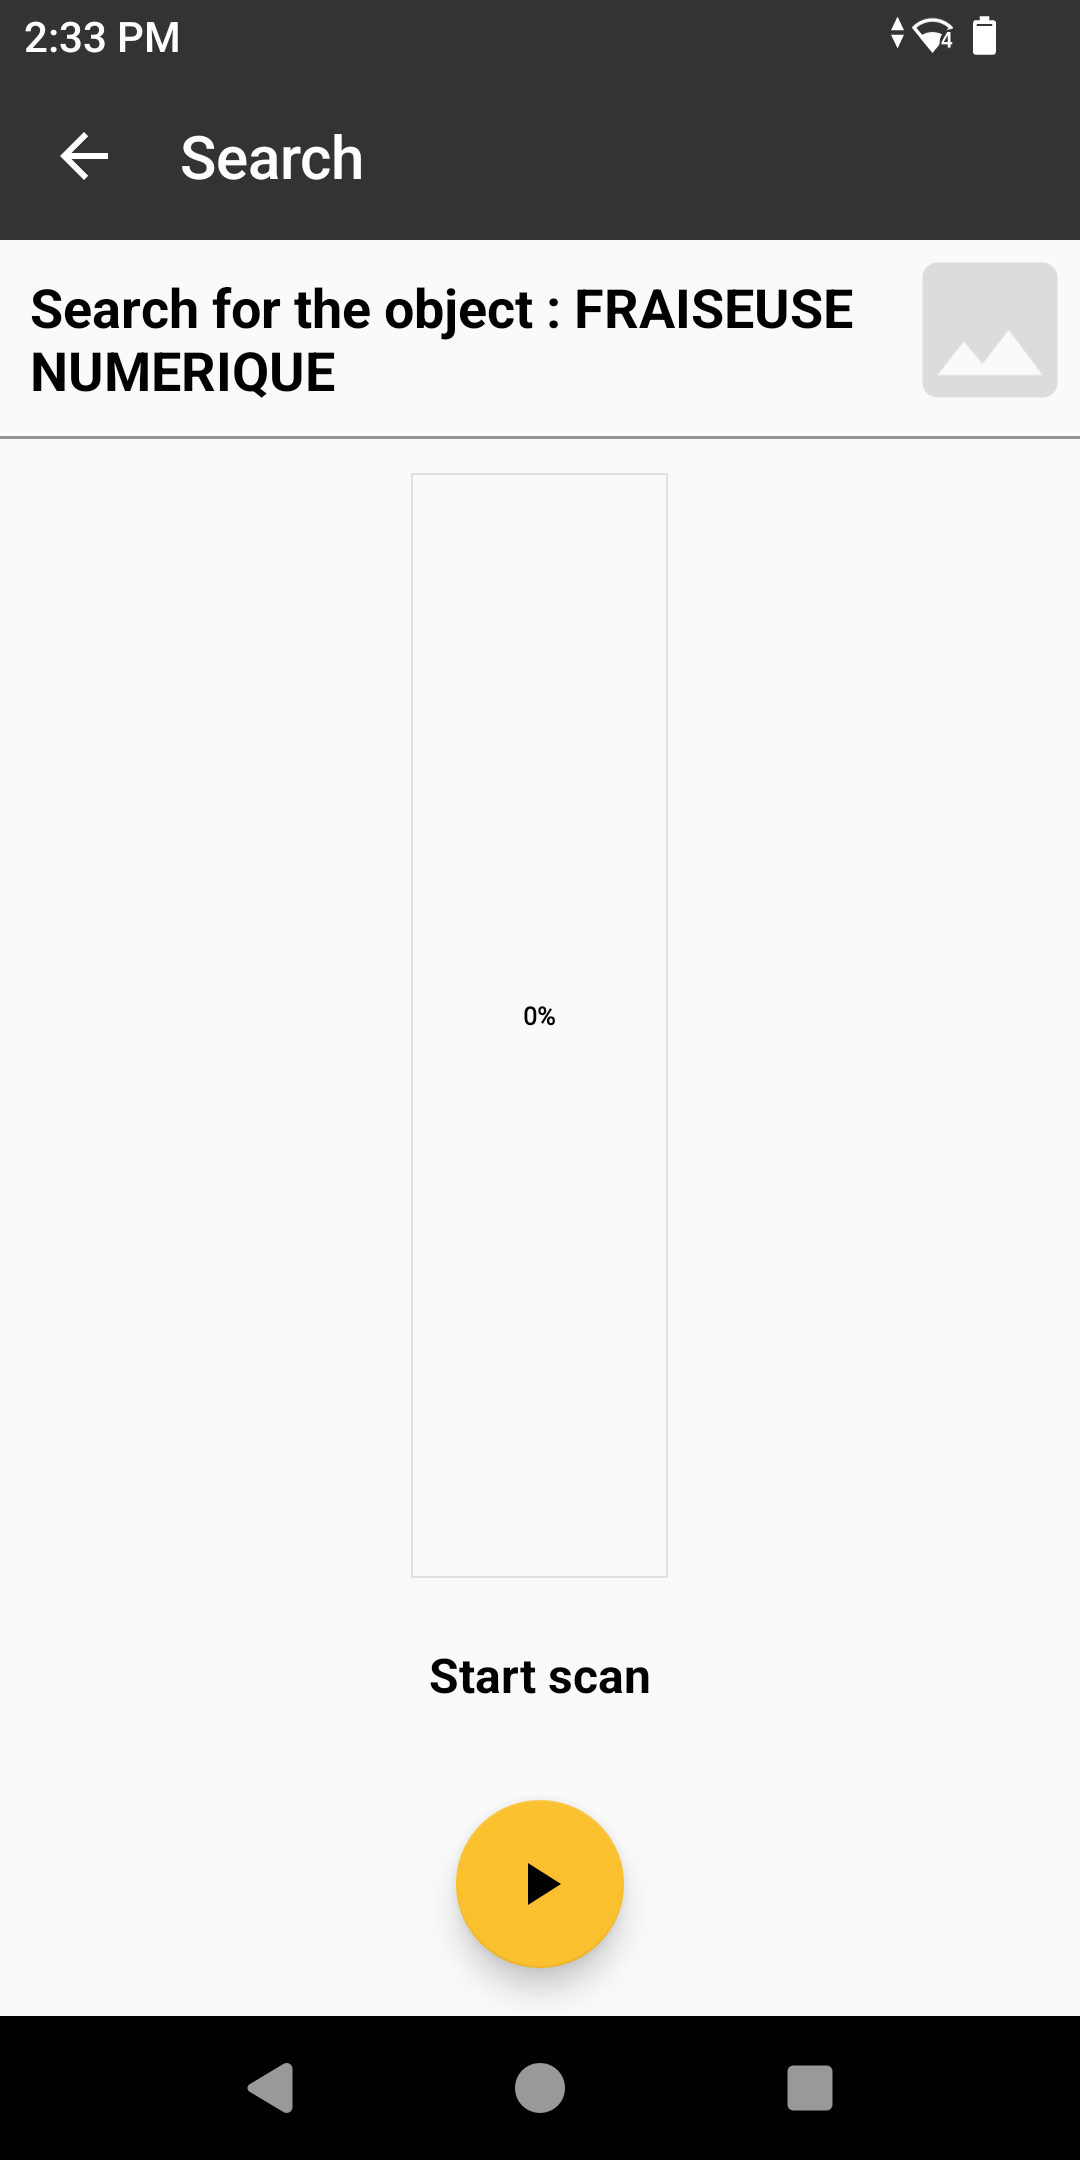
The additional words ‘search for object’, click on them to activate the short-distance search.
Use the trigger to start the RFID scan, the gauge in the middle of the screen will fill up depending on the quality of the signal received (distance indicator).
Unlink an object from the mobile app
From the object unlink option on the mobile application, you can unlink any type of tag, scan the MAC address present on the tag or manually search for the tag name in the object list.
Once selected, the tag is unlinked directly and the application returns you to the main menu.
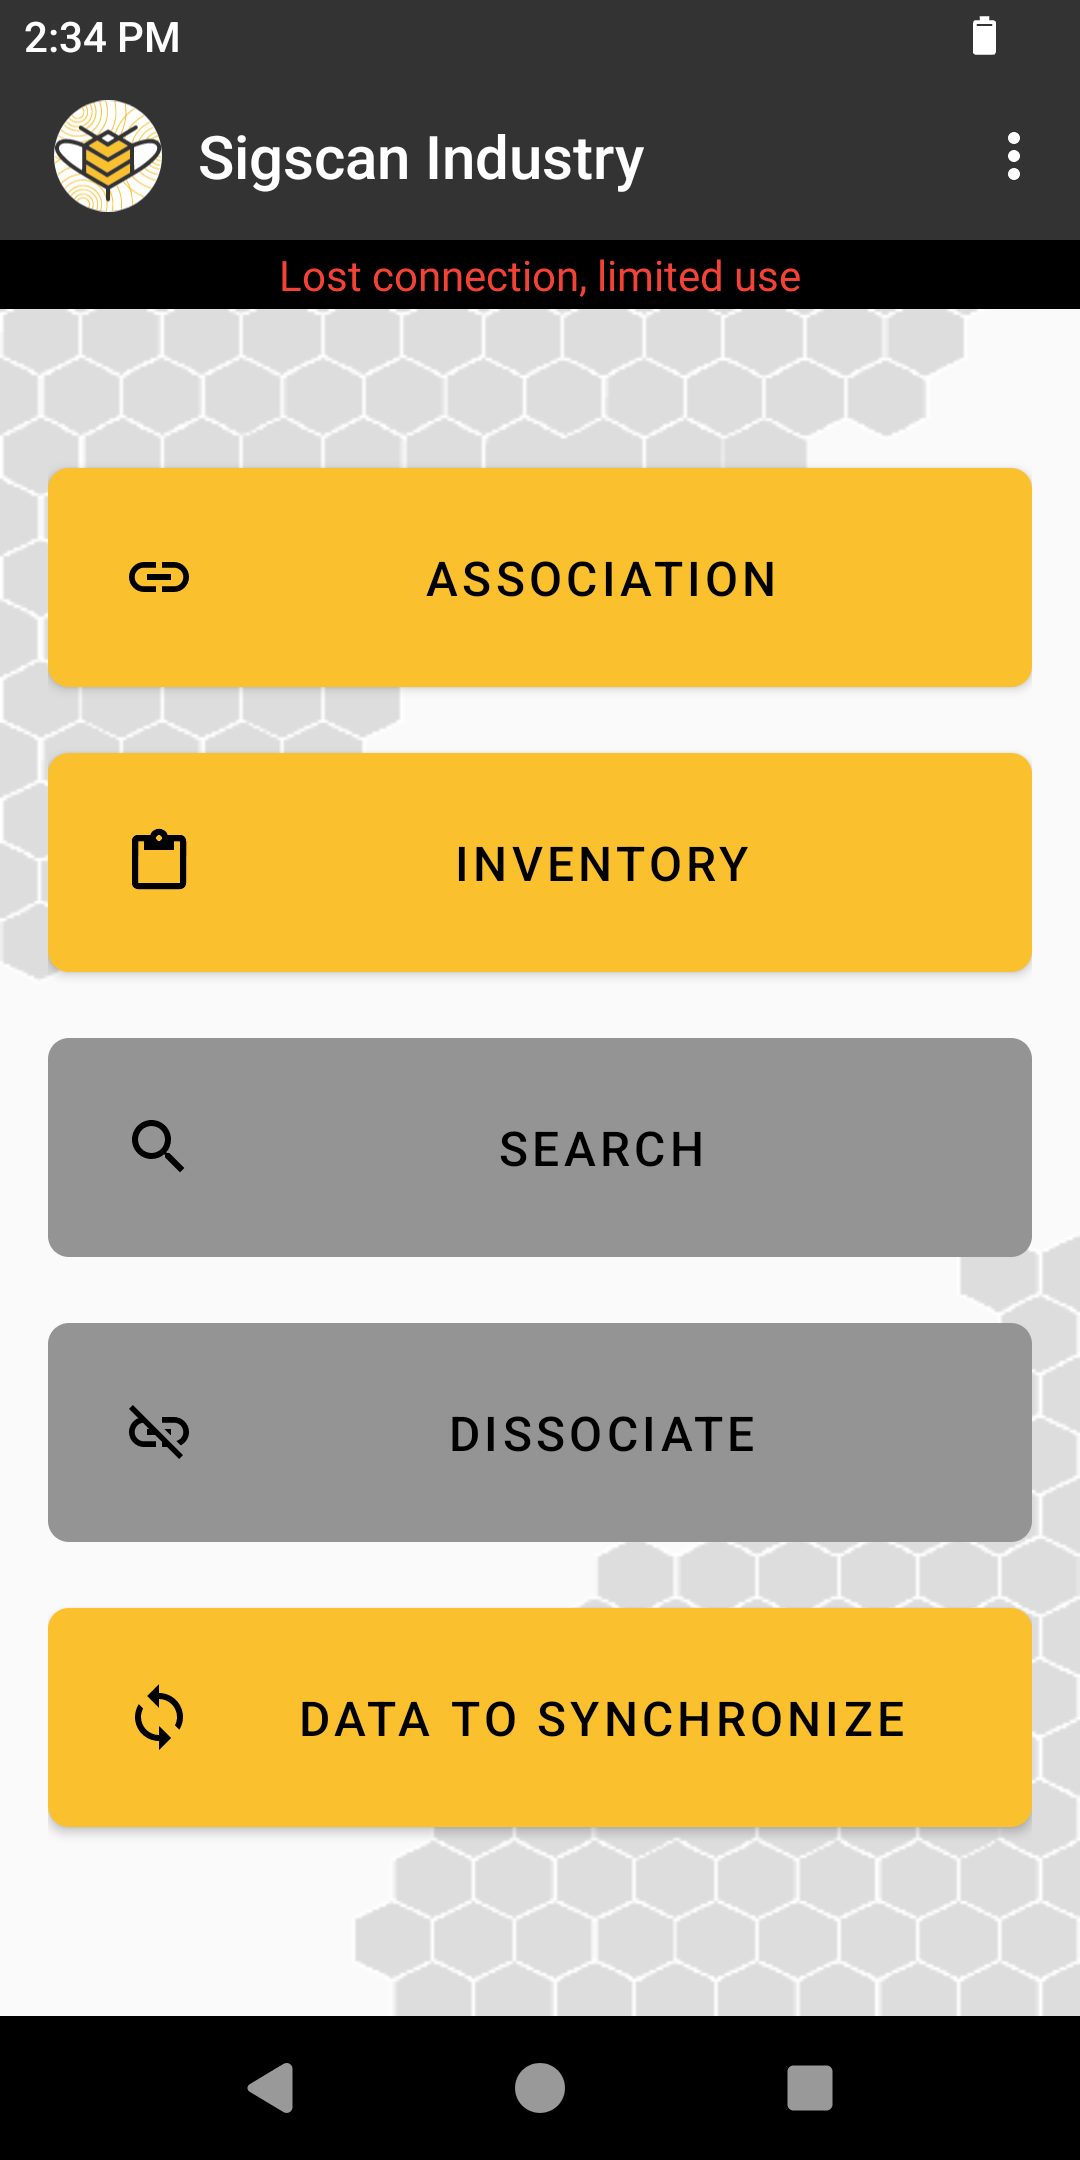
Degraded mode (offline)
You can also carry out your inventories in areas not covered by your establishment's network. The system automatically switches to offline mode if your mobile terminal loses the network. A message and a change in the menu interface will indicate that you have switched to downgraded mode.
Degraded mode requires 2 conditions to function correctly:
Be logged into your SIGSCAN account before switching to degraded mode.
Enter the inventory module before switching to degraded mode (data download).
If these two conditions are not met, you will not be able to switch to degraded mode. It will therefore be necessary to prepare mobile terminals in areas with coverage before carrying out inventories in areas without network coverage.
Degraded mode lets you :
Associate one or more objects
Create new objects and associate them
Create an inventory
You will follow the same procedures for these different stages as in connected mode.
Degraded mode requires you to synchronise your data.
As you can see from the illustration, a new button has appeared in the main menu, giving you access to a list of all the operations carried out in degraded mode and enabling you to synchronise them with the server once you're back in a networked zone.
You will need to use this interface to exit degraded mode.